Shakshuka

Shakshuka, also known as Eggs in Purgatory, is heaven on earth. By far my favorite savory breakfast dish, it consists of a dreamy tomato and bell pepper based sauce with eggs poached directly in the sauce. It draws on international roots spanning North Africa and the Middle East; shakshuka is thought to be from Tunisia or the Ottoman Empire. Regardless of its pedigree, it is welcome addition to any table.

Although I usually make shakshuka on the weekends when time is no object, I like to keep a batch of sauce in the freezer for quick fixes. For the vegans out there, don’t discount this recipe yet. Despite eggs taking center stage for the vegetarian version, it is the sauce that is the diva. It would be divine as a dip for fresh baked pita or seedy bagel. The recipe below serves two generously, but could easily be multiplied for larger crowds or stockpiling.

For this recipe, you will need

2 tablespoons olive oil
½ teaspoon cumin seeds
½ teaspoon coriander seeds
1 medium onion, sliced in thin crescents
1 cup stewed tomatoes or chopped fresh tomatoes
½ cup chopped barbecued red, yellow, or orange bell peppers (my favorite for addition of smoky flavor) or fresh peppers
1 tablespoons honey, sugar, or maple syrup
½ teaspoon smoked or regular paprika
½ teaspoon cayenne pepper, optional
½ teaspoon kosher salt or to taste
4 eggs
1/2 cup roughly chopped cilantro, stems are fine
1/4 cup roughly chopped parsley, stems are fine
½ teaspoon freshly ground black pepper or to taste

Tools:
Medium cast iron frying pan
Wooden spoon
Knife and cutting board
Lid that fits the frying pan or a cookie sheet

Process:
1. Heat the oil in the pan until it thins and coats the pan evenly.
2. Add the seeds and toast until a few pop.
3. Add the onions to stop the toasting. Stir to keep seeds from burning.
4. When the onions are translucent, but not soft, add the tomatoes, bell peppers, honey, paprika, and cayenne pepper. Cook, uncovered with stirring to prevent sticking, until the ingredients become saucy.
5. Taste for salt and add salt if necessary.
6. Gently crack the eggs into the sauce for poaching. Top with cilantro, parsley, and pepper. Cover with the lid or cookie sheet.
7. When the eggs are cooked to your liking, remove from the heat and serve. For extra authenticity (and fewer dishes) I like to bring the frying pan directly to the table.
8. Enjoy with fellow activists.

Middle Eastern Style Chopped Salad

In Northern California where I was born and raised, we are drowning in a sea of tomatoes and cucumbers. What is the absolute best thing to make with these items, especially if your cukes are a little too large? Chopped salad!

During the summer, tomatoes take over my life. They conquer my counter top, crowd out other fruit in my fruit bowl, and make their way into my breakfast, lunch, and dinner. Tomatoes take the place of ham for delicious vegetarian eggs benedict. Sun Gold cherry tomatoes get picked off the vine and popped into mouths for a sweet burst not expected from a “vegetable”. Summer revolves around tomatoes because once the first frost hits, it is bye-bye tomatoes until next year. Some how, after months of being spoiled with sweet, acidic, juicy fruit, a pinkish, mealy brick in a tomato shape doesn’t cut the mustard.

Since they are frost sensitive and are a summer time fruit, it doesn’t take too much imagination to figure out what is bad for them. There is no better way to kill the flavor and texture of a tomato than to refrigerate it. Unless your tomato is cut, keep it on the counter.

Tomatoes are one of many fruits that are susceptible to ripening by ethylene. Ethylene, for these fruit, is a self-fulfilling prophecy. Ethylene is given off by ripening fruit and encourages other fruits to ripen too. Just like flooding the market with a industrial product, plants use ethylene to ripen all their fruit at once to make sure some of their babies make it to maturity by providing a ton of fruit for animals all at once. If you want to ripen a tomato faster, enclose it in a paper bag with another ethylene sensitive fruit like apples, pears, or peaches. If you want to prolong the life of your fruit, keep them separate and store them in a well-ventilated area.

Middle Eastern Style Chopped Salad

For this recipe, you will need:
1 medium to large cucumber, preferably Persian or English
2-3 medium tomatoes or 2 handfuls cherry tomatoes. I like to use a variety of colors for visual appeal and taste. If acid is a problem for you, choose yellow tomatoes.
¼ medium onion
3 pepperoncinis, optional
3 tablespoons olive oil
½ teaspoon salt, or to taste
½ teaspoon pepper, or to taste
¼ cup crumbled feta. I prefer Bulgarian style feta, which is softer and creamier than Greek brined feta. 2 tablespoons vegan cream cheese plus 1 tablespoon red wine vinegar maybe substituted for vegans.
1 tablespoon mint, chopped using the chiffonade method

Tools:
1 medium bowl
Knife
Vegetable peeler
Cutting board

Process:
1. Dice cukes, tomatoes, onion, and pepperoncinis in ¼ inch or smaller cubes.
2. Combine veggies, oil, salt, pepper, feta, and mint in a large bowl.
3. Eat immediately or chill for 30 minutes to allow flavors to mix.
4. Enjoy with fellow activists.

Shakshuka

Shakshuka, also known as Eggs in Purgatory, is heaven on earth. By far my favorite savory breakfast dish, it consists of a dreamy tomato and bell pepper based sauce with eggs poached directly in the sauce. It draws on international roots spanning North Africa and the Middle East; shakshuka is thought to be from Tunisia or the Ottoman Empire. Regardless of its pedigree, it is welcome addition to any table.

Although I usually make shakshuka on the weekends when time is no object, I like to keep a batch of sauce in the freezer for quick fixes. For the vegans out there, don’t discount this recipe yet. Despite eggs taking center stage for the vegetarian version, it is the sauce that is the diva. It would be divine as a dip for fresh baked pita or seedy bagel. The recipe below serves two generously, but could easily be multiplied for larger crowds or stockpiling.

For this recipe, you will need

2 tablespoons olive oil
½ teaspoon cumin seeds
½ teaspoon coriander seeds
1 medium onion, sliced in thin crescents
1 cup stewed tomatoes or chopped fresh tomatoes
½ cup chopped barbecued red, yellow, or orange bell peppers (my favorite for addition of smoky flavor) or fresh peppers
1 tablespoons honey, sugar, or maple syrup
½ teaspoon smoked or regular paprika
½ teaspoon cayenne pepper, optional
½ teaspoon kosher salt or to taste
4 eggs
1/2 cup roughly chopped cilantro, stems are fine
1/4 cup roughly chopped parsley, stems are fine
½ teaspoon freshly ground black pepper or to taste

Tools:
Medium cast iron frying pan
Wooden spoon
Knife and cutting board
Lid that fits the frying pan or a cookie sheet

Process:
1. Heat the oil in the pan until it thins and coats the pan evenly.
2. Add the seeds and toast until a few pop.
3. Add the onions to stop the toasting. Stir to keep seeds from burning.
4. When the onions are translucent, but not soft, add the tomatoes, bell peppers, honey, paprika, and cayenne pepper. Cook, uncovered with stirring to prevent sticking, until the ingredients become saucy.
5. Taste for salt and add salt if necessary.
6. Gently crack the eggs into the sauce for poaching. Top with cilantro, parsley, and pepper. Cover with the lid or cookie sheet.
7. When the eggs are cooked to your liking, remove from the heat and serve. For extra authenticity (and fewer dishes) I like to bring the frying pan directly to the table.
8. Enjoy with fellow activists.

Perpetual Pesto

As a special treat, Rachel, my brilliant partner in food related crime who normally provides the adorable cartoons, and I are switching roles. This recipe is all her own concoction written in her hand. And I get to dabble with watercolor. Foodies can wear many hats folks. Enjoy.

Freezer Pesto
It’s wonderful to have small (1/2 cup) Tupperware containers of pesto available in the freezer. The pesto can also be frozen in an ice cube tray and stored in a plastic bag. You can take the pesto out for a weeknight meal of pesto pasta, or toss it into soups to thicken the consistency and add flavor.

Defrosting the pesto in the microwave blanches the leaves and turns the pesto a brilliant emerald green. Pecorino or parmesan cheeses can be added after the pesto is defrosted, along with more olive oil to bring the pesto to your desired consistency.

4 cups lightly packed basil leaves
4 tablespoons pine nuts
¼ cup olive oil
¼ cup butter
2 garlic cloves
½ teaspoon salt

Blend ingredients in a food processor until smooth.

Baked Eggplant with Freezer Pesto
Serves 6 as a side dish

1 cup of freezer pesto
¼ cup of lemon juice
¼ cup of olive oil
1 large eggplant, sliced into ½ inch crosswise pieces

Whisk pesto, lemon juice, and olive oil in a large bowl. Reserve ¼ cup of dressing.

Coat eggplant slices in sauce and place on a baking sheet lined with parchment paper (for ease of cleanup). Broil eggplant 4 inches from heat source for 7-10 minutes on each side.

Pour reserved dressing over eggplant. Garnish with fresh basil leaves.

New Life

I have excuses. So many excuses. Here’s how they go: I really intended to be a good blogger, but then there is life. In between a new home, a new puppy, a new job, blogging fell by the wayside. But, there is more newness: a new garden!

Therefore, we can talk about new things! Is that a good enough excuse for the hiatus?

Here’s what I’m harvesting:
Carrots: Tendersweet and Nantes
Kale: Dino
Cilantro
Lettuce: Brune d’hiver
Broccoli: mystery!
Peas: super mystery! (I got the seeds at the National Heirloom Expo in Santa Rosa, which I highly recommend you attend too).

Here’s what I have planted, either in beds already or in pots:
Beans: French fillet
Garlic: boring white, Purple Glazer, Bogatyr
Onions: torpedo, Walla Walla, and some other mysteries
Cabbage: Golden acre
Leek: Extra large Carentan
Parsnip: All American
Melons: Collective Farm Woman (big hopes for this one), Hale’s Best 45, Melon Ananas Amerique
Winter Squash: Kikuza, Jarrahdale, New England Sugar Pie, Burgess Buttercup
Summer Squash: Striata D’Italia, Table Dainty
Cukes: Suyo Long, De Bourbonne, Mexican Sour Gherkin
Tomatoes: San Marzano, Reisetomate (crazy looking!), Gezahnte, Ox heart, Cherokee Purple, Candy Sweet, Ananas Noire
Spicy Peppers: Thai Burpa, Yellow Cayenne, Shishito, Sante Fe Grande, Pasilla Bajio
Sweet Pepper: Italian Pepperchini, Red Mini, Jimmy Nardello

Perennials:
Artichoke: Purple Globe
Rhubarb
Black Currant: Ben Sarek
White Currant: Pink Champagne
Late season Raspberry: Taylor
Summer bearing Black berry: triple crown
Fruit Salad Tree with grafts of plum, yellow peach, white peach, and nectarine
Santa Rosa Plum
Hardy Kiwi (different than regular kiwi, “fur-less” and small)
Meyer Lemon
Two types of Grapes

And don’t even get me started on the flower garden. See, I have been busy!
Here’s how I’ve been dealing with the loads of peas I’ve been picking lately:
For this recipe, you will need:
2 large handfuls of fresh peas, picked over, rinsed, and stringed if necessary
2 cloves garlic
Juice of 1 lime
2 tablespoons soy sauce, tamari, or Bragg’s

Tools:
Steaming Basket (aka, space ship!)
Pot with a lid the steamer fits in
Timer
Knife
Cutting board
Salad bowl
Garlic press
Lemon reamer or other juicing device
Measuring spoons or the willingness to guess

Process:
1. Put the salad bowl (preferably not plastic) in the fridge.
2. Rinse the peas and string them if need be. If you never strung peas before, here’s a quick primer: find the stem end and pull towards the opposite end so a fiber pulls away from the pod. Repeat, ad nasuem. Obviously, this is better with another mental stimulation going on. Might I suggest The Young Turks?
3. Start heating 1 inch of water in the pot and cover about five minutes before you think you will be finished stringing peas
4. Pile the peas into the steamer and place in the now boiling steam bath. Set the timer for 2 minutes.
5. Remove the peas immediately and place in the cold salad bowl.
6. Add the garlic (remember, no peeling necessary if you use a garlic press!), lime juice, and soy sauce.
7. Enjoy with your lovers and friends!

Ketchup on Ketchup

I recently saw a Heinz ketchup ad that read, “I put ketchup on my ketchup.” I can relate to that sentiment. While I do love the classics like Heinz, summer’s bounty is too delicious to ignore. Add so, I made this ketchup that elevated a humble weekday meal of homefries and vegetables to something so much more delectable. Not only does this ketchup go where normal ketchup belongs on potatoes of all sorts and lots of veggie burgers, but is at home as a bread dip, sandwich spread, fried egg topping, or even as an Indian chutney. Now, keep in mind this is not just your standard ketchup with only tomatoes; this recipe uses eggplant, onions, and a plethora of spices. I like the extra silkiness the eggplant lends and caramelized onions serve as a fantastic hearty foundation for the other layers of flavors to nestle into.

Hearty Homemade Ketchup

For this recipe, you will need:
¼ cup olive oil
½ a medium onion, chopped finely
½ a medium eggplant, in ~1/2 inch cubes
3 medium tomatoes, chopped roughly
3 cloves garlic
Pinch ground cloves
2 teaspoons dry mustard (the spice, not the condiment)
½ (or more) teaspoons chili powder
½ cup sugar, honey, agave or other sweetener
2/3 cup vinegar (start slow and taste as you go; I like an acidic bite!)
Salt to taste

Tools:
Large saucepan
Knife
Cutting board
Garlic press
Spoon
Blender, optional

Process:
1. Heat the oil in the pan over medium heat.
2. Add the onions. When the onions are translucent, add the eggplant. If the eggplant sticks, gradually add more oil.
3. When the eggplant is soft, add the tomatoes, garlic, cloves, mustard, and chili. Simmer over medium heat until smooth and silky.
4. Add the sweetener, vinegar, and salt. Taste and remove from heat.
5. Optional: blend until smooth. I made it chunky and it was a nice divergence from the pureed grocery store kind.

Thanks to Rachel for yet another charming cartoon.

Hints of Summer

Sorry for the long delay in recipe goodness. Since my last post an embarrassingly long time ago, I’ve been doing things like settling into a fantastic job, choosing a grad school, and trying to find a place to live that is affordable, where I can have compost pile, and where my cat won’t get smushed by cars. I’ve been spending a lot of time with the Excel “pro vs. con” template and I’ve noticed that my highest weight factors usually were food related. As I was telling one of my friends, “I really can’t consider living in a place where my food isn’t transported only by human powered vehicle.” What a bike + food snob.

This week the forecast predicts temperatures in the low 90s; summer is nipping the spring bud. In our CSA we received a tomato and 3 (!) zucchini, which were both grown in an unheated greenhouse, but still grown here. Summer is coming and fast! We’ve been getting little baskets of strawberries in the CSA for weeks now, but with the sudden heat they’ve gone from tasting like wet Styrofoam to fragrant, delicious berries.

Israeli style couscous is a bit different than “normal” couscous – it is spherical and much larger. I think it has a nice bite (I’m not a fan of how mushy normal couscous gets) and is traditionally toasted prior to boiling, giving it a pretty golden color and mouth filling taste. If you can’t find Israeli couscous, substitute orzo, shells, or another small pasta, but not normal couscous.

Here’s what has been happening in the kitchen:

Honey, I'll scratch your back if you scratch mine.


Strawberry Juice
For this recipe, you will need:
1 cup fresh strawberries, hulled
3-4 medium-ish frozen strawberries (to make it cold!)
2 tablespoons of honey (unfiltered, preferably local to combat seasonal allergies)
1-2 cups water
Mint spring

Tools:
Knife
Measuring things
Blender or food processor or hand-mashing dedication

Process:
1. Place all strawberries, honey, and water in the blender.
2. Whirl until pureed.
3. Taste and consider more honey or water.
4. Pour into glass/es (I suggest hoarding it all for yourself) and garnish with the mint spring so you feel like you are on vacation.

Zucchini Israeli Couscous
Modified from Animal, Miracle, Vegetable

For this recipe, you will need:
1 ½ cups Israeli style couscous
2 tablespoons olive oil
1-2 quarts water for boiling couscous
2 tablespoons olive oil
1 spring onion, chopped (including some green parts)
2 cloves garlic, whole and unpeeled
1 to many zucchini, with peel, shredded
1-2 sprigs thyme
¼ cup nutritional yeast
2 tablespoons (or more) milk (almond, soy, rice, etc. all work great)
Salt and pepper to taste
¼ cup fresh basil, chopped

Tools:
Medium-large heavy bottomed pan or Dutch oven
Spoon
Mesh colander
Knife
Grater
Garlic press
Measuring things

Process:
1. Place the couscous and oil in the pan and cook over medium high heat. Stir occasionally.
2. Continue toasting until the majority of couscous pearls are golden brown and the pan is emitting a heavenly fragrance, similar to baking bread.
3. Add water (watch out for splattering!) and stir to break up any chunks of pasta. Boil over medium heat until the pasta is cooked through.
4. Drain couscous into the colander. Rise excess starch off.
5. In the same pan, add another 2 tablespoons olive oil with the onions. Saute over medium heat until translucent.
6. Add garlic, zucchini and thyme. Saute for another 2-3 minutes.
7. Add the couscous back in with the nutritional yeast, milk, salt, and pepper.
8. Top with chopped basil. (If you don’t have fresh basil – skip it. No need for topping beautiful pasta with gray leaf confetti).

Thanks to the beautiful and talented Rachel Silverstein for the glorious drawings.

Wonders of Cookin’ with Cashews: Creamy Cashew-Pepper Penne

For my very first Green Grub post (ZOMG), I decided my grand debut recipe must be vegan, of course, and this thought naturally led to the decision to make one of the main ingredients this, a staple of vegan cuisine – cashews.

Cashews, if you folks didn’t know, are one of the Seven Wonders of Vegan Food World. Yes, they are like the Great Pyramid of Giza of said Plant-Based Wonderland.

Cashews are hardy just as this last remaining Wonder of the Ancient World is. As most know, the appreciable amount of protein packed into this nutritious nut (I was this close to going for the NUTritious gag…phew!) makes it both a healthy and filling snack. You may also know that the high antioxidant content means it is good for your heart as well, reinforcing this idea of cashews being… HEART-y. It is possibly lesser known that magnesium is just as important for bones as is calcium and that our wondernut is an excellent source of this. Thus, these HARD-y cashews also help to… HARD-en our bones! [LAUGH TRACK]

I’ve got a million of these.

Beyond that, well, I can’t really think of any other similarities between the Great Pyramid of Giza and the seeds stuck to the bottom of cashew apples. I’ll have to work on my analogies.

But what makes the cashew worthy of being positioned on this pedestal alongside a 481-foot-tall man-made Egyptian pyramid, you ask? Let me tell you about the wonder factor. Cashews are so vegan-versatile that they can be used to make milk, cheese, cheesecake, whipped cream, creamy sauces (that’s us!), and so much more.

Furthermore, extracts of various parts of the cashew tree can be seen in traditional medicine – as an aphrodisiac, anti-inflammatory, antidysenteric, and antihemorrhagic. Whether it is effective as such cannot be confirmed in any of these cases except the aphrodisiac. I mean, what’s more attractive than not having inflamed, hemorrhaging dysentery? Not much, my friends… not much.

On that note, I hope you’re hungry. Here’s what you’ll need:

1 pound of penne
1 cup of raw, unsalted cashews
2 red bell peppers
1 onion
1 tablespoon of olive oil
½ teaspoon of paprika
Your favorite vegetables for steaming (or whatever you have in your CSA box – I used asparagus and spinach)
Salt and pepper (optional)

Steps:

1. Soak your cashews in water, either overnight if you’re organized enough to plan that far ahead, or for 15 minutes if you’re a normal human being.

2. Bake the red peppers at 425°F for 15-20 minutes, or until the skins begin to blacken. Allow them to cool enough to handle them, then peel off the skins and slice open to remove the seeds. CAUTION: Before removing the skin, hold the pepper upright to pull off the green stem and pour out the juice inside! You don’t want to spray pepper juice in anyone’s eyeballs. (This is a kitchen, not a peaceful protest.)

3. Get your soaked cashews into a blender, add water barely to the top of the cashews, and blend to reach a smooth, creamy consistency. Feel free to add extra water if necessary.

4. Dice the onion and sauté it in the olive oil until the color becomes translucent. Then throw in the peppers and cashew cream and let this mixture simmer (to cook over low heat) for 8-10 minutes. Remember to stir frequently!

5. When finished cooking, toss in the paprika, as well as the salt and pepper, if you’re one to salt things. Mix and let cool.

6. While the sauce is cooling, there will likely be some multitasking happening in the background. Boil some water, get your penne in, salt the pasta, and cook until al dente. You can follow any instructions that may have come with your pasta.

7. This would also be the time to steam those veggies!

Side Note: There do exist fancy kitchen devices designed specifically for this purpose – they call these steamers. However, I, like my food god Alton Brown, try to avoid single-use/single-function apparatuses as they’re not very sustainable. Therefore, grab a pot and a colander – two common enough cooking tools – stick the colander inside the pot so it barely fits inside, fill the pot with just enough water so that the water doesn’t actually touch the colander, and BAM! Instant homemade steamer, y’all. Give yourself a well-earned pat on the back.

Side note aside, let’s continue with this steaming process. Turn on the heat and when the water’s boiling, throw in your vegetables and put a lid on it. Cooking time will vary from crop to crop, but may range anywhere from about 4-10 minutes. You can decide on your own when it’s soft enough to chew without your jaw locking up, and when it’s basically mush. Somewhere in between would be groovy.

8. Once the cashew sauce is cooled, blend it until smooth. Drain your al dente penne. Pull out your steamed goods. Now mix it all together… and voilà! Enjoy with 4-6 fine friends.

Food, friends, and fun in the sun... Life is good.

Citrus Time is Here Again!

Oh beautiful and delectable, sweet and surprising citrus! Since we are the California Student Sustainability Coalition with a lovely Mediterranean climate, we get to celebrate the winter months with bright and fresh citrus fruits. Although gone are the days where a single orange was given for Christmas, citrus can truly breakup the hum drum of your winter diet. As we begin to see more unique citrus varieties (Buddha’s hand anyone?), using citrus in cooking can be downright exciting.

While many types of citrus are most enjoyable eaten directly out of hand (see mandarins, oranges, and tangerines), sometimes a bit of citrus tucked inside something unexpected can be the hit of a party.

In this post, we will share the hidden uses of citrus: orange cream soda for big kids, shaved fennel and grapefruit salad, and lemon poppy seed cake. The first two recipes are vegan or vegan optional and the last recipe contains egg.

Orange Cream Soda (one serving)
For this recipe, you will need:
2 oranges or 4 mandarins/tangerines
1 cup water
2/3 cup sugar
2/3 cup water
1 cup club soda or carbonated mineral water, chilled
Small handful of ice cubes
2 tablespoons soymilk creamer
1 shot orange flavored vodka (either homemade using the infused alcohol recipe or store bought)

Tools:
Vegetable peeler
Spoon
Small saucepan
Glass
Knife
Measuring items

Process:
1. Peel the zest off the orange using the veggie peeler, trying to avoid large swaths of white pith. If your zest is especially pithy, use the spoon to scrape off the pith.
2. Heat the 1 cup of water and the zest strips in the saucepan. Bring to a boil and then remove from the stove and drain. This step is to remove bitterness from the zest.
3. Add the 2/3 cup water and sugar to the saucepan and bring to a boil. Remove from the heat when the liquid thickens slightly to a syrup-like consistency and the zest is translucent.
4. Remove the zest pieces and cool the syrup in the fridge. Slice the zest into thin slivers.
5. Combine the club soda, ice, creamer, and vodka in the glass. Sweeten to taste with the syrup. Garnish the top with a few slivers of candied zest.

Shaved Fennel and Grapefruit Salad
For this recipe, you will need:
1-2 whole fennel bulbs
1-2 grapefruit
2 tablespoons olive oil
1 clove garlic, crushed
1 tablespoon honey or agave syrup
2 tablespoons avocado, mashed
Salt and pepper, to taste

Tools:
Mandolin or very sharp knife
Paring knife
Small bowl
Garlic press
Fork
Serving bowl

Process:
1. Remove any brown spots and leafy bits off of the fennel. Shave the fennel with the mandolin or slice very thin (1/8 inch). Place in the serving bowl.
2. Remove the outer pith and the inner skin of the grapefruit. Cut out each section of the grapefruit and place in the serving bowl. (Watch how to here.)
3. Squeeze the remaining juice out of the skin into the small bowl to make the dressing.
4. Add the oil, garlic, honey and avocado to the bowl and mix until creamy with the fork.
5. Dress the salad and add salt and pepper to taste.

Lemon Poppy Seed Cake (adapted from Bon Appetite)
For this recipe, you will need:
1 cup Earth Balance or another dairy free spread, softened
3/4 cup granulated sugar
2 large eggs
2 tablespoons poppy seeds
1 1/4 cups all-purpose flour (I use a mix of unbleached white and whole wheat pastry flour)
1 teaspoon baking powder
1 lemon zest from one lemon (preferably a Meyer lemon)
1/4 teaspoon salt

For the glaze
1 1/2 cups confectioners sugar
Fresh lemon juice of one lemon

Tools:
9 inch cake pan
Pastry brush (or paper towel)
Large bowl
Rubber spatula
Wisk
Grater or microplane
Lemon reamer or juicer
Small bowl
Fork

Process
1. Grease a 9-inch round cake pan with the pastry brush or towel.
2. Beat together vegan spread and granulated sugar in a large bowl with spatula until pale and fluffy.
3. Beat in eggs until combined.
4. Whisk in poppy seeds, flour/s, baking powder, lemon zest, and salt to the wet ingredients.
5. Spread in cake pan and smooth the top. Bake at 375 for about 30 minutes, or until golden brown on the top.
6. While cake is baking, whisk together the lemon juice and powdered sugar. Pour the glaze over the warm cake.
7. Slice this little piece of heaven as soon as possible.

Fermented Foods Part Two: The Best Way in the Entire World to Eat Kale

Because this recipe is so delicious, the title deserves capitalization.
I feel like this post might be cheating, because this was not my recipe originally. However, since I make it on a weekly basis, I do feel the need to share the gospel. The basis for this recipe comes from Adam Mann, a fantastic cook and writer at Wired magazine online.

It used to be that kale was the bottom of the barrel item in our CSA. I had to sneak it into soups and blend it with spinach in Indian and Middle Eastern food. Now, it is the first item to go and usually gets eaten on veggie basket day.

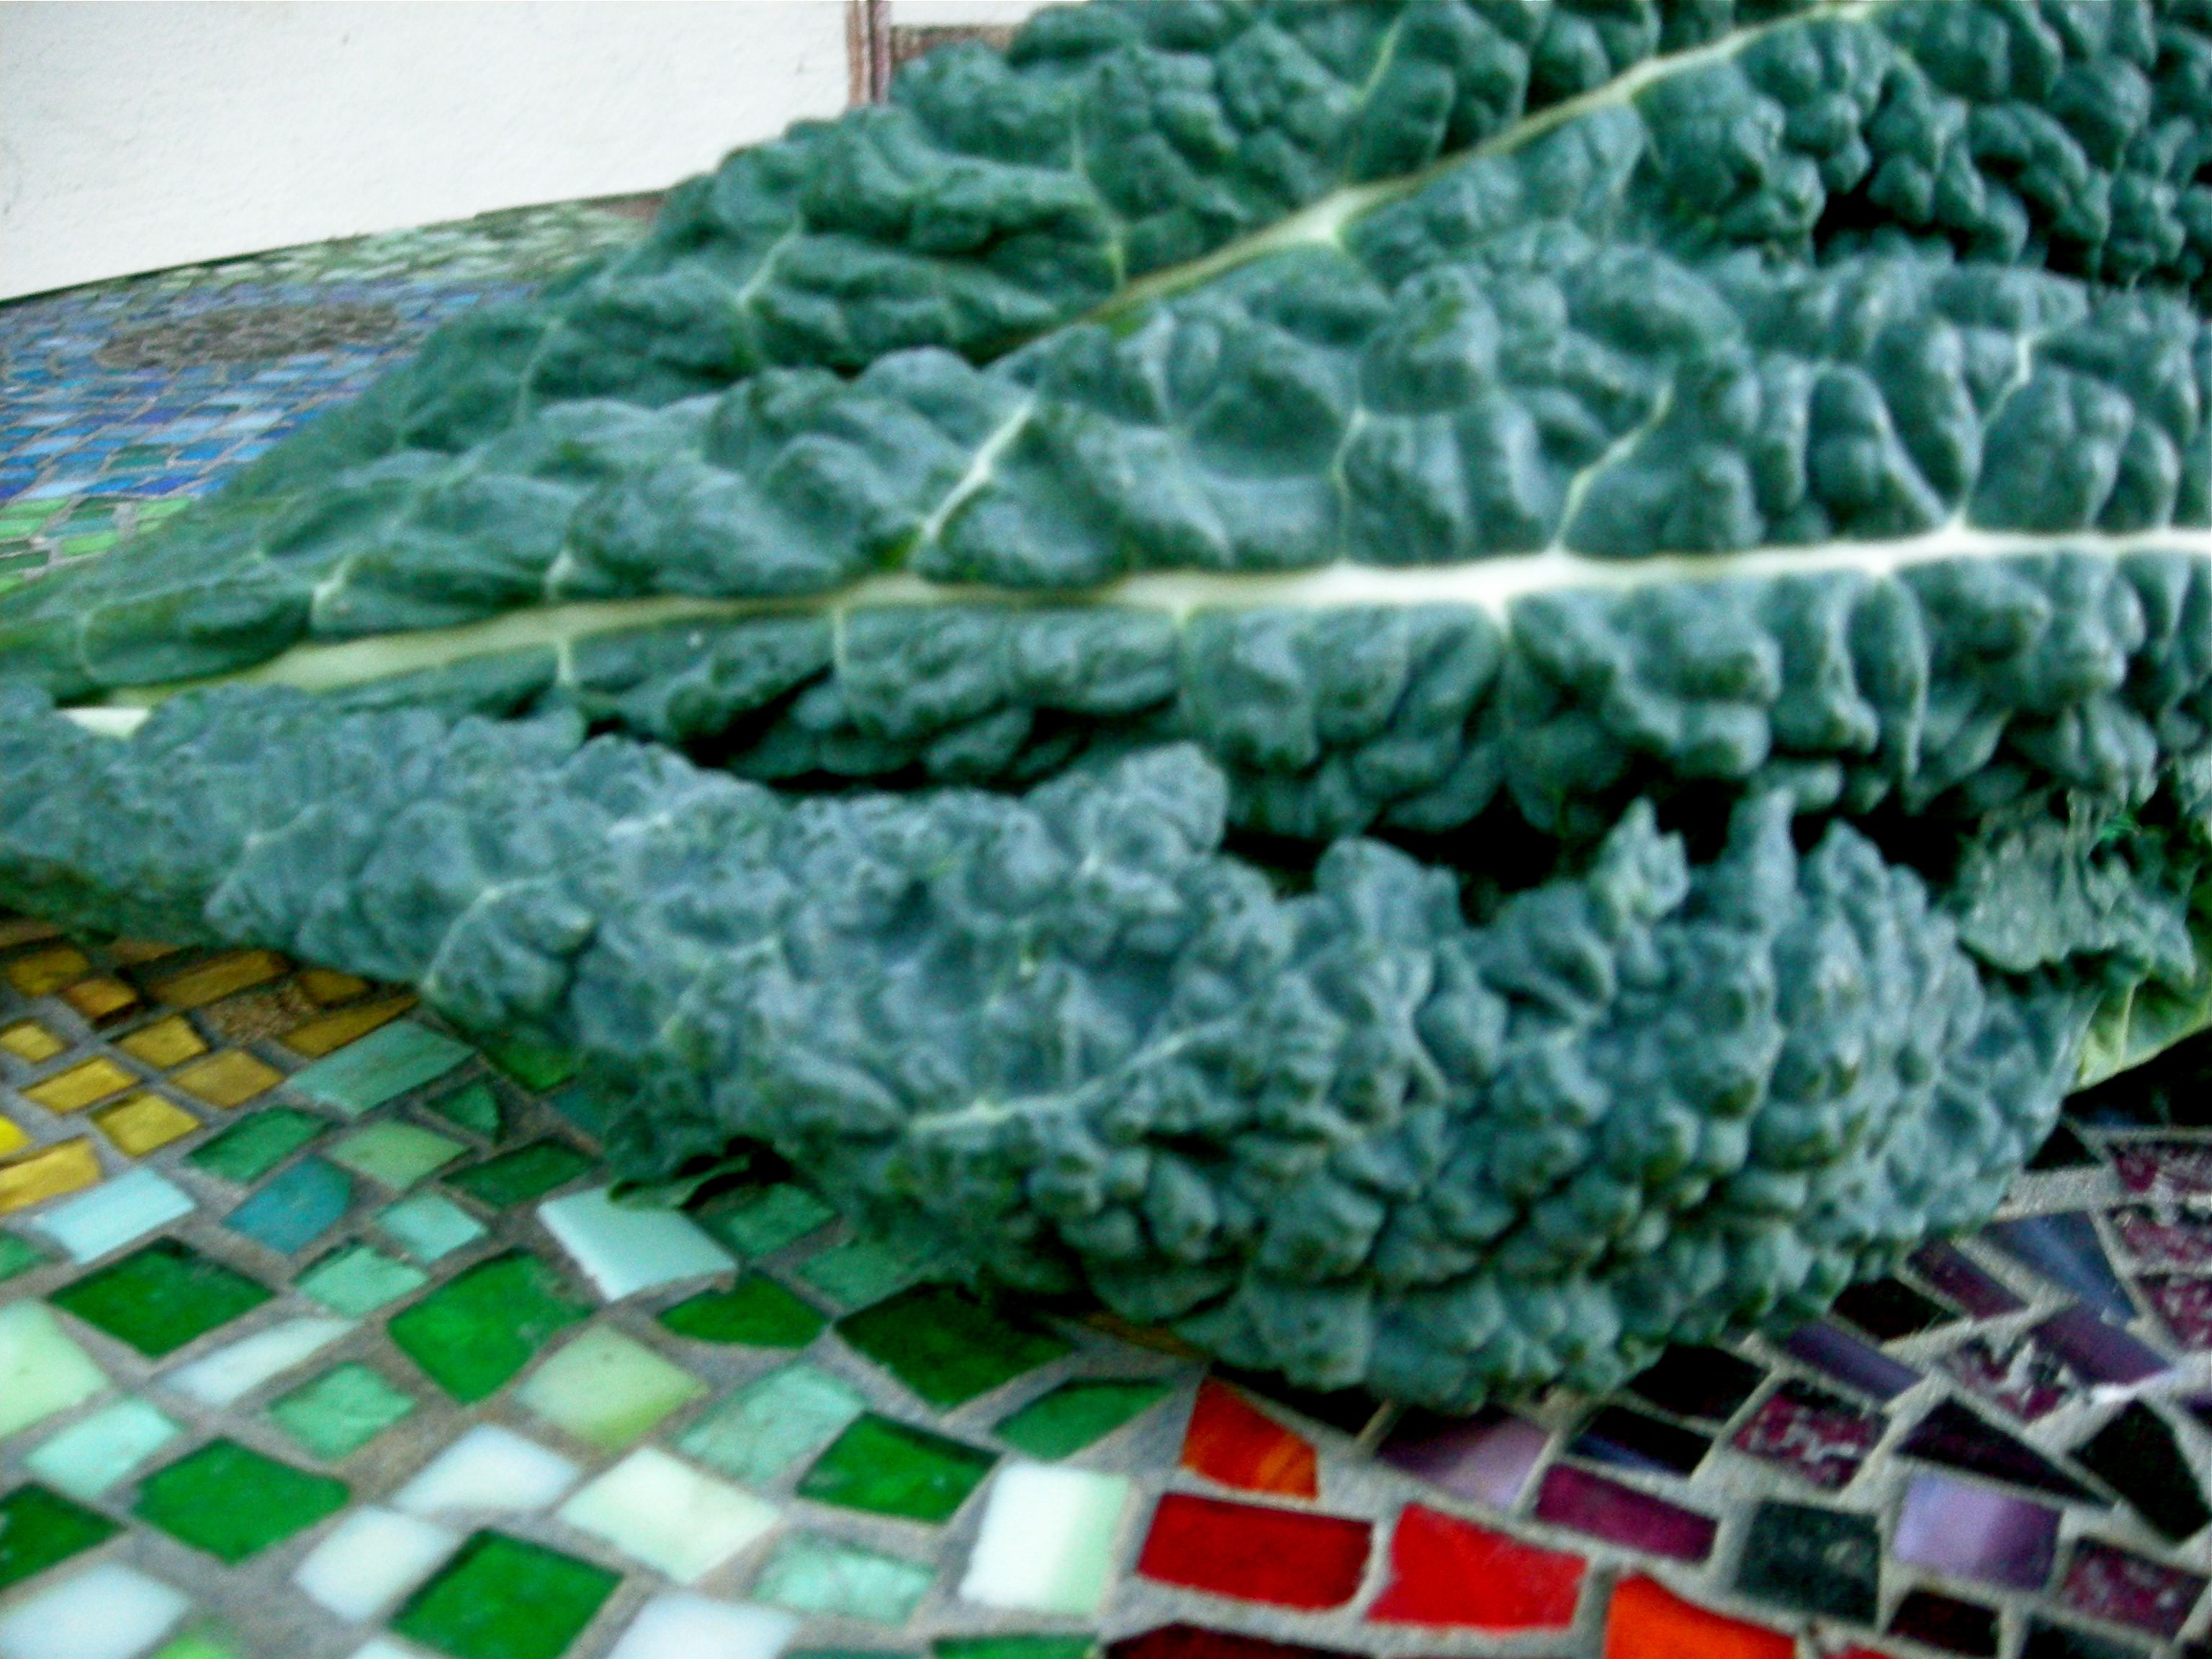
Look at those lusty curves Love me some kale with curves.


What could make a vegetable that my father used to feed to our chickens the most delectable item in the basket? A delicious blend of sweet, salty, savory, sour, spicy, and umami in salad dressing form fits the bill.

Miso, one of the ingredients that makes this dressing so tasty, is a delicious fermented food. Although I have yet to make it on my own due to the year plus fermentation time and unusual ingredient list, miso can be made from the by-product of soy milk – the leftover ground up beans known as okara. Fermentation breaks down the beans so they are more digestible and, if I do say so myself, more delectable. Miso comes in many colors, fermentation lengths, and consistencies. I’ve been using white miso, as it is what my local grocery carries under an organic and GMO- free brand.

Another fermented food that is best supporting actor in this dressing drama is apple cider vinegar. All traditional vinegars are made by fermentation. In fact, less than stellar wine that you deem undrinkable can be fermented into wine vinegar. I prefer apple cider vinegar that is unfiltered and raw, meaning that the happy little bugs and their dead friends can still be found in the vinegar. Love them bugs.

Enough talk, here’s how to move kale into the coveted food category.

For this recipe, you will need:
1 (or two or three or eight) bunches of kale (I prefer dino kale, which is thin, very dark, bumpy, and dare I say sweet)
¼ cup plus 2 tablespoons olive oil
3 cloves garlic
2 tablespoons miso paste (like I said, I’ve been using white miso. Make sure to taste for saltiness if using another type)
2 teaspoons Bragg’s Amino Acid liquid (or soy sauce or tamari, but again, check the saltiness)
½ cup nutritional yeast
2 tablespoons unfiltered apple cider vinegar

Tools:
Colander or Salad Spinner
Frying pan
Knife
Cutting board
Salad bowl
Garlic press
Measuring spoons or the willingness to guess

Process:
1. Wash the kale. Check the underside of leaves for hiding aphids – especially in bumpy varieties.
2. Heat the frying pan with 2 tablespoons of olive oil. When water flicked on the surface skips around, take the kale by the stems and wipe around the pan. The goal of this process is to wilt the kale ever so slightly. The edges of the kale should turn a more intense green. It should take about 1-2 minutes.
3. Use the knife to remove the stems and veins from the leafy portions of the kale. I like to do this by holding the stem and running a very sharp knife along the tough vein.
4. Chop the kale into a rough chiffonade by rolling the leaves into a large roll and chopping thin slices perpendicular to the roll.
5. In the bowl combine ¼ cup olive oil and crushed garlic. Stir.
6. Add in the miso and mix until incorporated.
7. Add in the Bragg’s, yeast, and the vinegar.
8. Taste the dressing – my usual problem is that it is too salty in which case I add more vinegar and oil but I don’t like things very salty.
9. Using your hands, toss in the kale.
10. Serve to your adoring fans.

Fermenting with weight

Get Your Ferment On

As we pull into the darkness and cold of winter, our immune systems can take a real hit. Not only does dry air ruin our first defenses like gooey mucus to catch all those flying bits of bacteria (yes this is a food blog and I am talking about mucus, delicious), but the lack of physical activity and proper nutrition generally associated with the season can be detrimental to your well-being.

Enter fermented food. According to Sandor Katz, the fermented food god of the modern homesteading movement, fermenting can create new or release existing nutrients, make food more digestible (think soy and dairy), reduce or eliminate toxins from foods, and reintroduce beneficial bacteria to our guts. All that stuff is good news! Or rather, good old news given that fermenting is one of the oldest preservation methods used.

We live in a world where there are countless products and methods for eliminating the possibility of fermentation and microbial activity. Just think about the omnipresence of bleach and hand sanitizer! Similar to living in a diverse community, it is not about elimination, but about creating an environment where the good stuff can happen. As an engineer who plays with microbes and organisms on the teeny tiny scale daily, I have an immense respect for our little friends. If you are fermenting at the wrong temperature or if you let weird things get into the mix, your potential delicious ferment can turn into a moldy, gushy mess. Respect the bugs. Feed them the right foods. Make them a nice home and they will never do you wrong.

You might have noticed that it is wintertime and in California, that means cabbage time. Although there are practically no bounds to what can be fermented (I made some ridiculously tasty baby dill pickles this summer), we’re going to share how to make some mean sauerkraut. Many are turned off by sauerkraut, but that is probably because their only experience with the stuff has been the nearly white, droopy confetti-like substance found in dusty jars and (more unfortunately) cans. You know why that stuff sucks? It is because it is dead… and the delicious kraut you can make at home will be more alive than Frankenstein on a stormy night.

In our kraut we will be growing the following bacteria: Coliform, Leuconostoc and Lactobacillus (Katz).

Note on the cabbage from Mama of Kraut, Maggie Lickter: Green cabbage makes crunchy and moist kraut, Napa or Chinese cabbage makes moist and floppy kraut, and red cabbage makes crunchy and dry kraut. You can mix and match to figure out which kraut fits you best.

For this recipe, you will need:
Cabbage (see note above)
2 tablespoons sea salt (I prefer sea salt for kraut because sea salt has a more diverse array of minerals than kosher or table salt which means that more of the needs of your microbes will be taken care of)
Boiled water

Optional Seasonings/veggies:
Crushed garlic (be gentle with this because you can easily go overboard)
Peppercorns or chili flakes
Caraway, dill, fennel, cumin, or coriander seeds (give them a little toast for extra seasoning love!)
Carrots, radishes, kohlrabi, and beets (shred these puppies and add them to the wilting cabbage)

Tools:
Cutting board
Large, sharp knife
Large bowl
Wooden mallet, hefty spoon, or pestle for cabbage beating
Jar with a mouth that is large enough to put another smaller jar or glass (I like to use the kind with the rubber gasket and metal clip)
That smaller glass or jar we talked about
Heavy things like ball bearings, marbles, or cleaned rocks
Cheesecloth, optional

Process:
1. Wash the cabbage and remove one nice big leaf and set aside.
2. Chop up the cabbage into thin shreds or chunks.
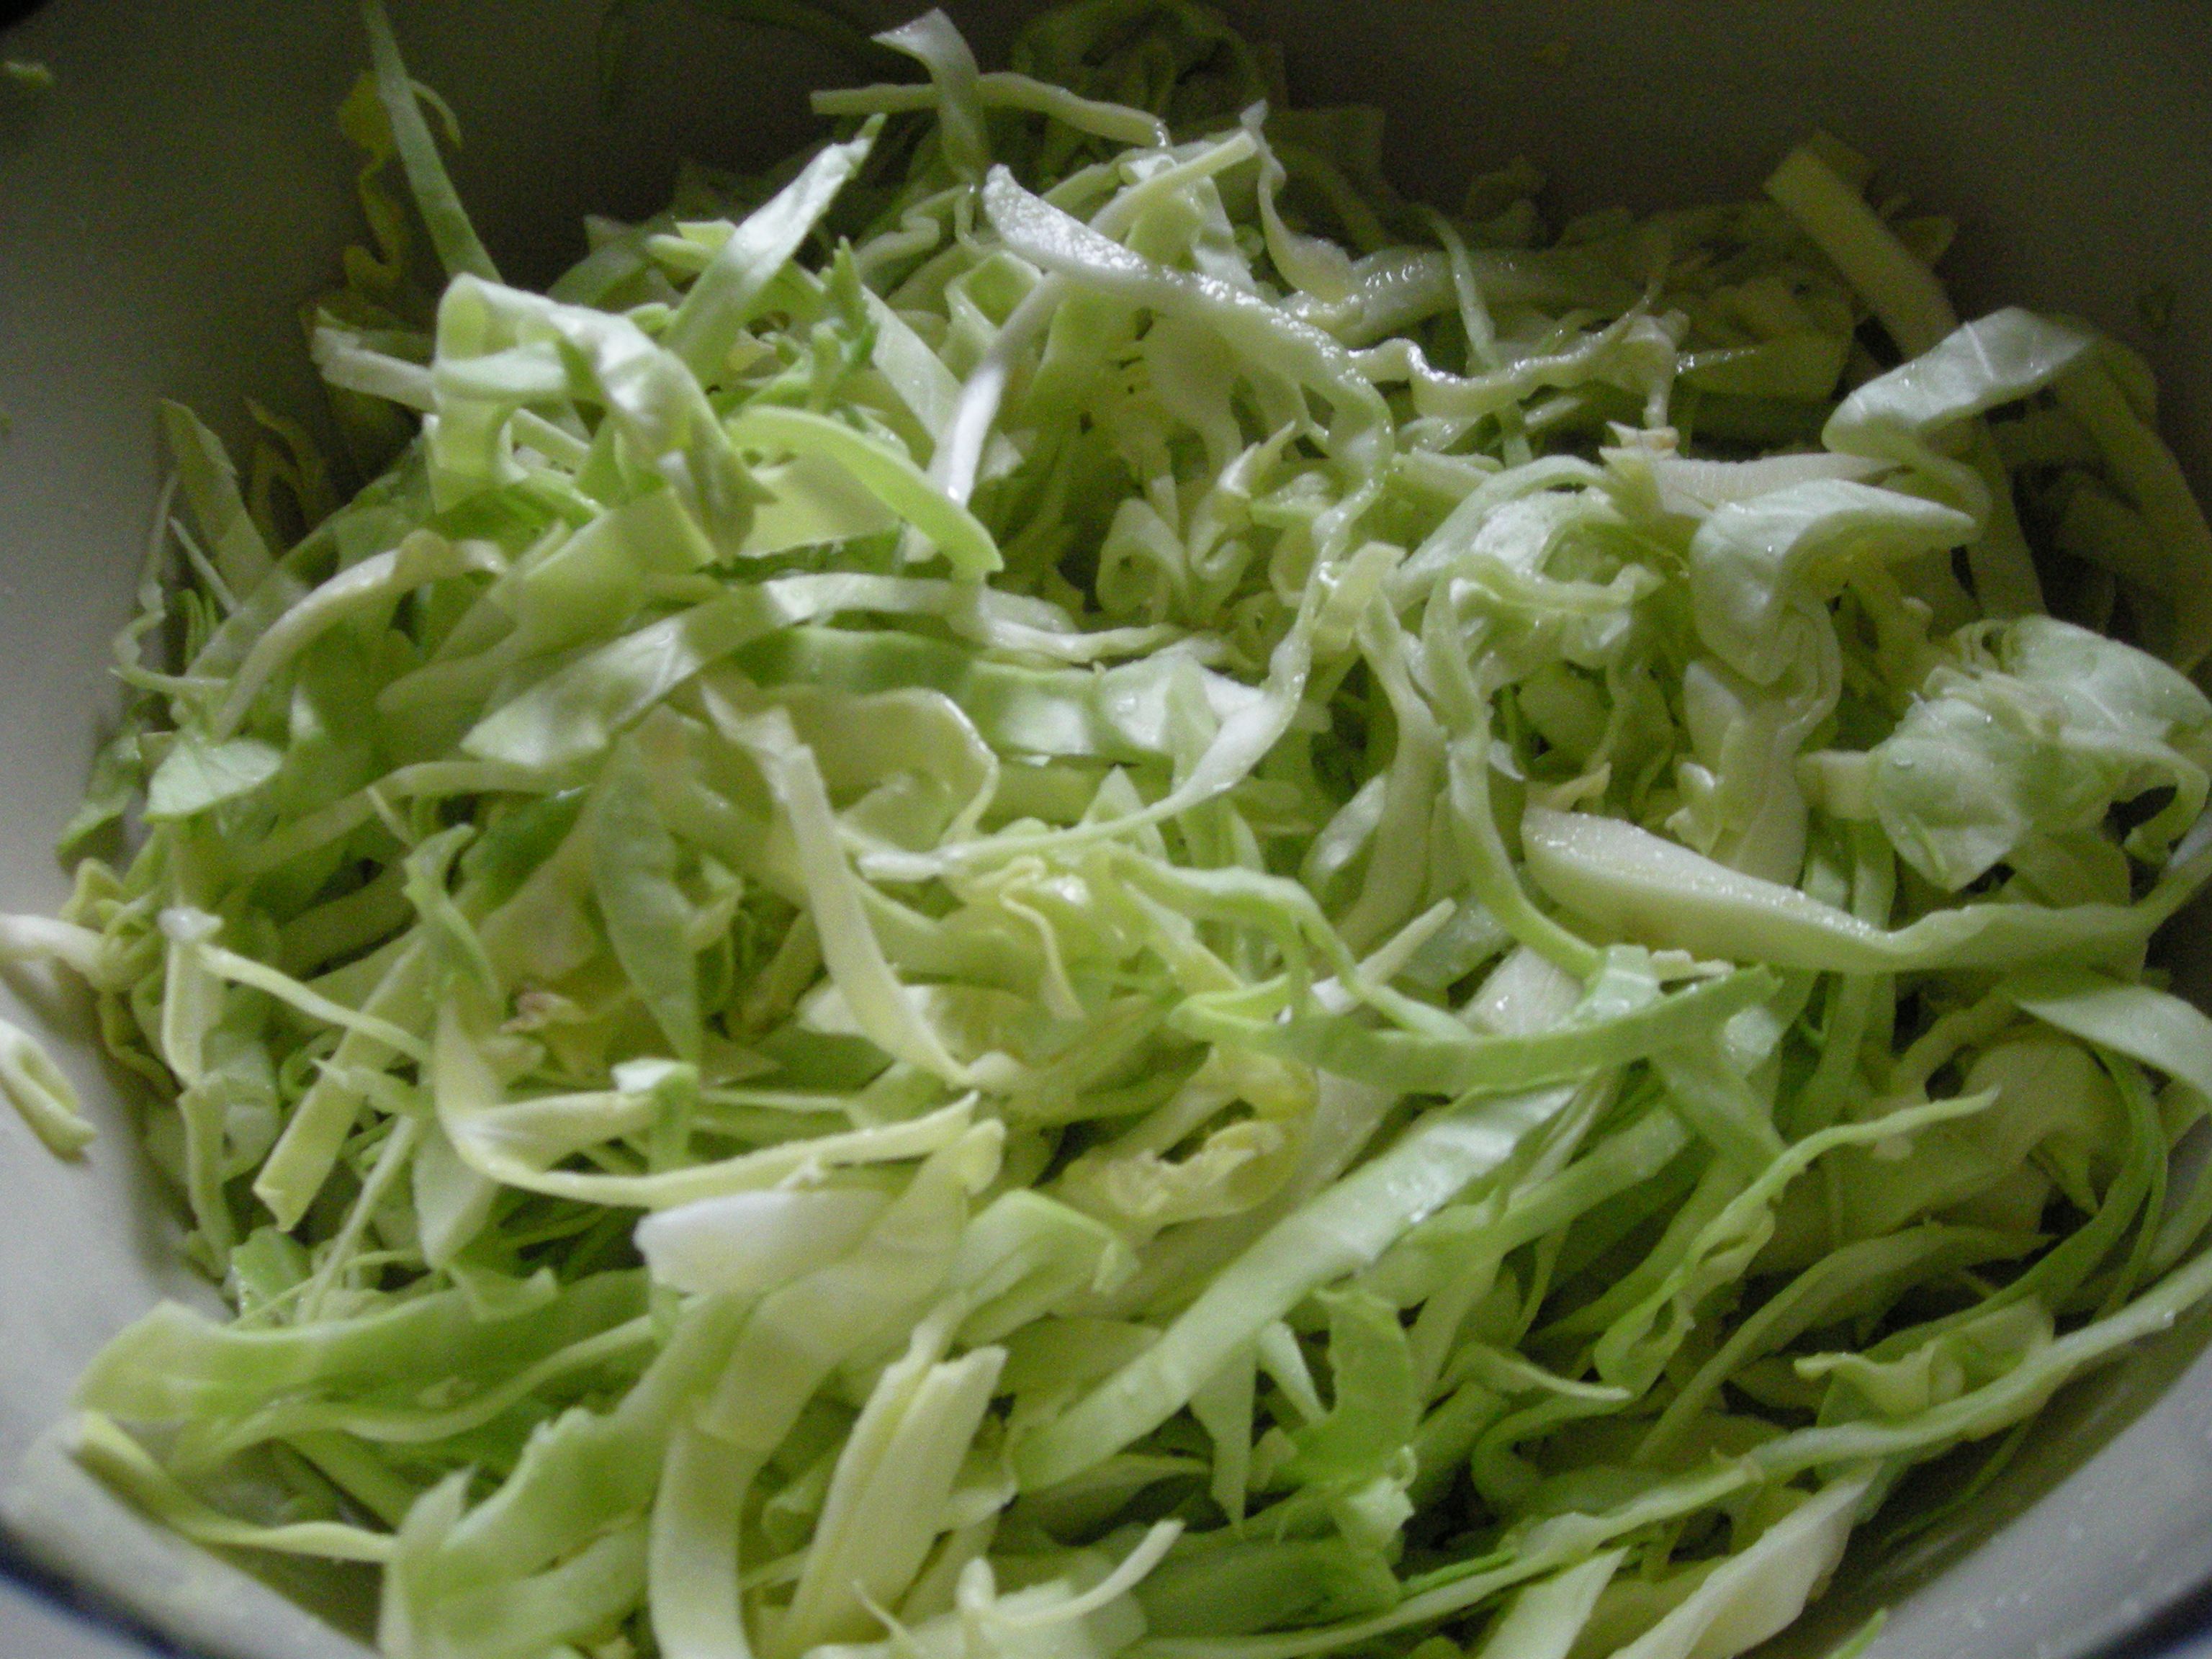
Chopped cabbage before wilting.


3. Put the cabbage (and any other veggies you might be using) into the bowl and sprinkle with salt.
4. Let wilt for about 30 minutes to 1 hour. Consider a dance party during this interval.
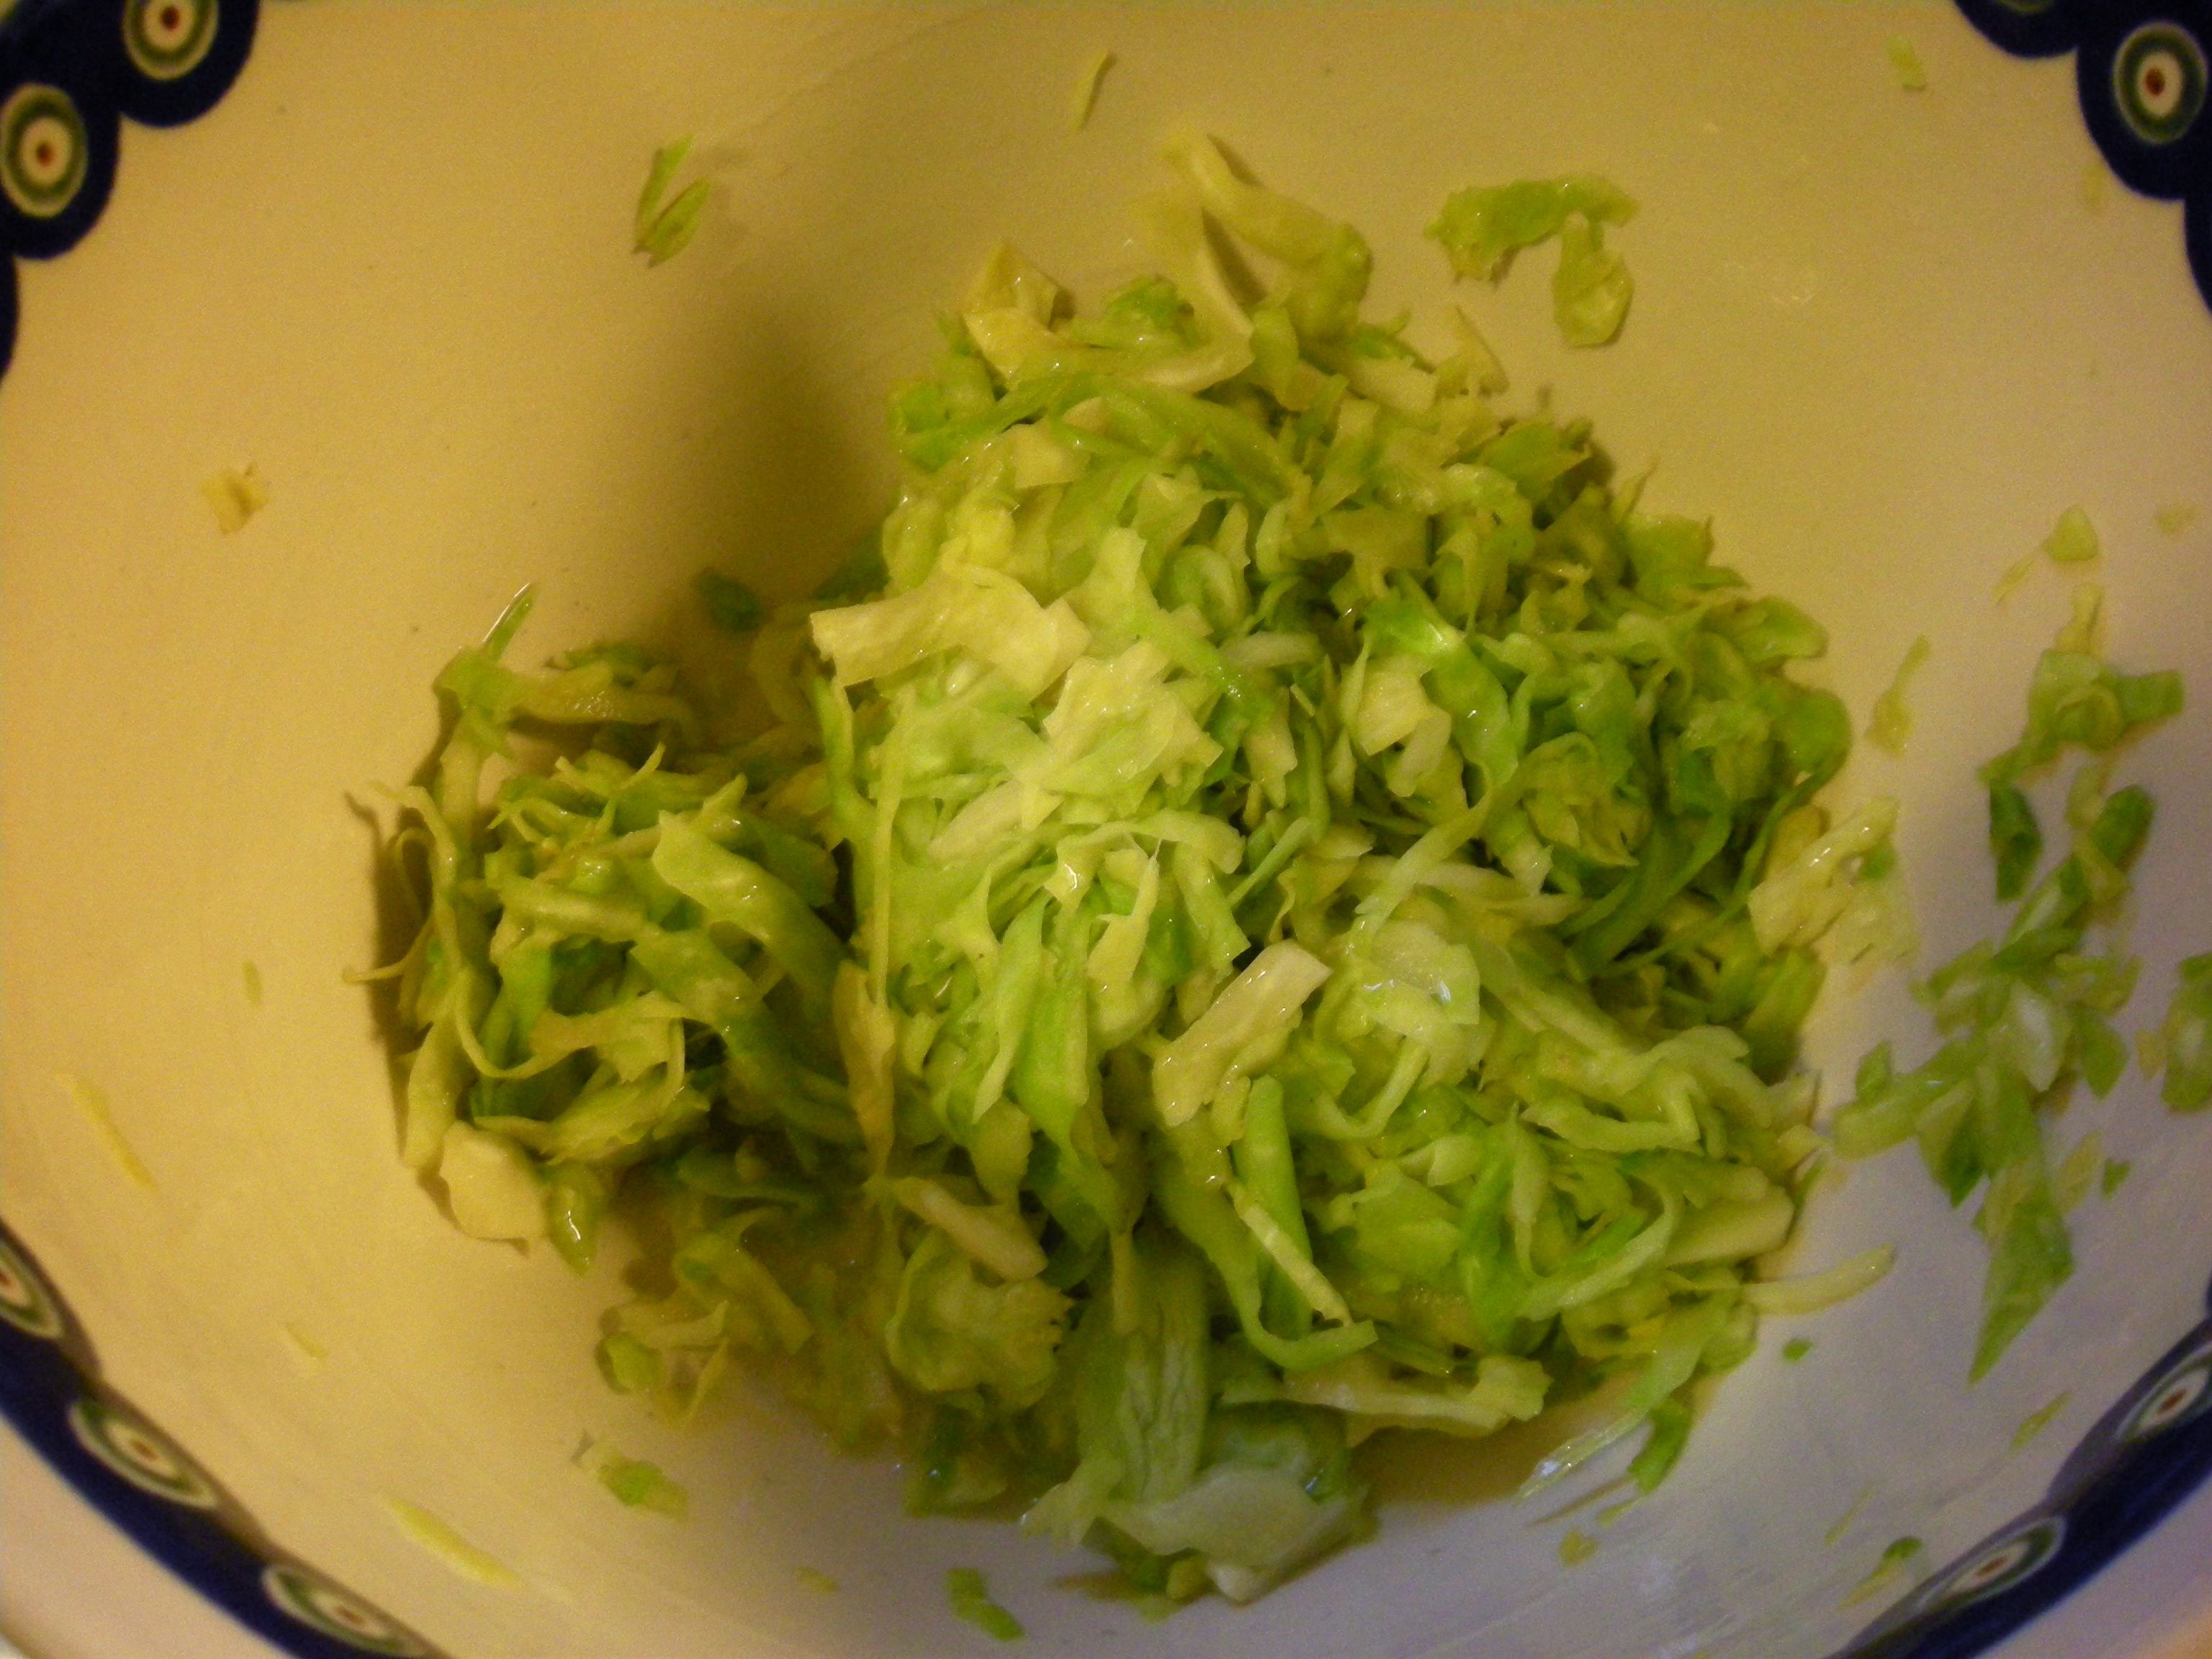
Chopped cabbage after wilting and beating. Notice how it small and floppy now that it is beaten.


5. Use your hands, the mallet, spoon, or pestle to beat the living daylights out of the cabbage. The end result is to have very wilty, limp cabbage and lots of cabbage juice/guts. I can usually get about 1 cup out of a whole green cabbage.
6. Add any other flavorings to the cabbage.
7. Pack the cabbage into the big jar. The goal is to have as few bubbles between the leaves as possible. I usually use my fists for this part.
8. Cover with the reserved cabbage leaf, trimming it if it doesn’t fit in the jar.
9. Fill the smaller jar/glass with heavy things and place on top of the cabbage leaf.
10. If the cabbage juice does not cover the big cabbage leaf, add a bit of the boiled, cooled water until it does. If you have to add a lot (which you shouldn’t because of your mad beating skills), consider adding more salt.
11. Wrap with the cheesecloth if you want to get fancy or if you are worried about critters getting into your kraut.
12. Put in a cool, dry place. Check on your fermenting babies daily or every other day. Bubbles (of CO2) mean that that magic is happening. In warm weather (75-90 deg F), fermentation should happen in about 3-5 days. In cold weather (35-65 deg F), turning the cabbage into kraut can take up to 2-3 weeks. Take a little taste to see how your microbes have progressed.
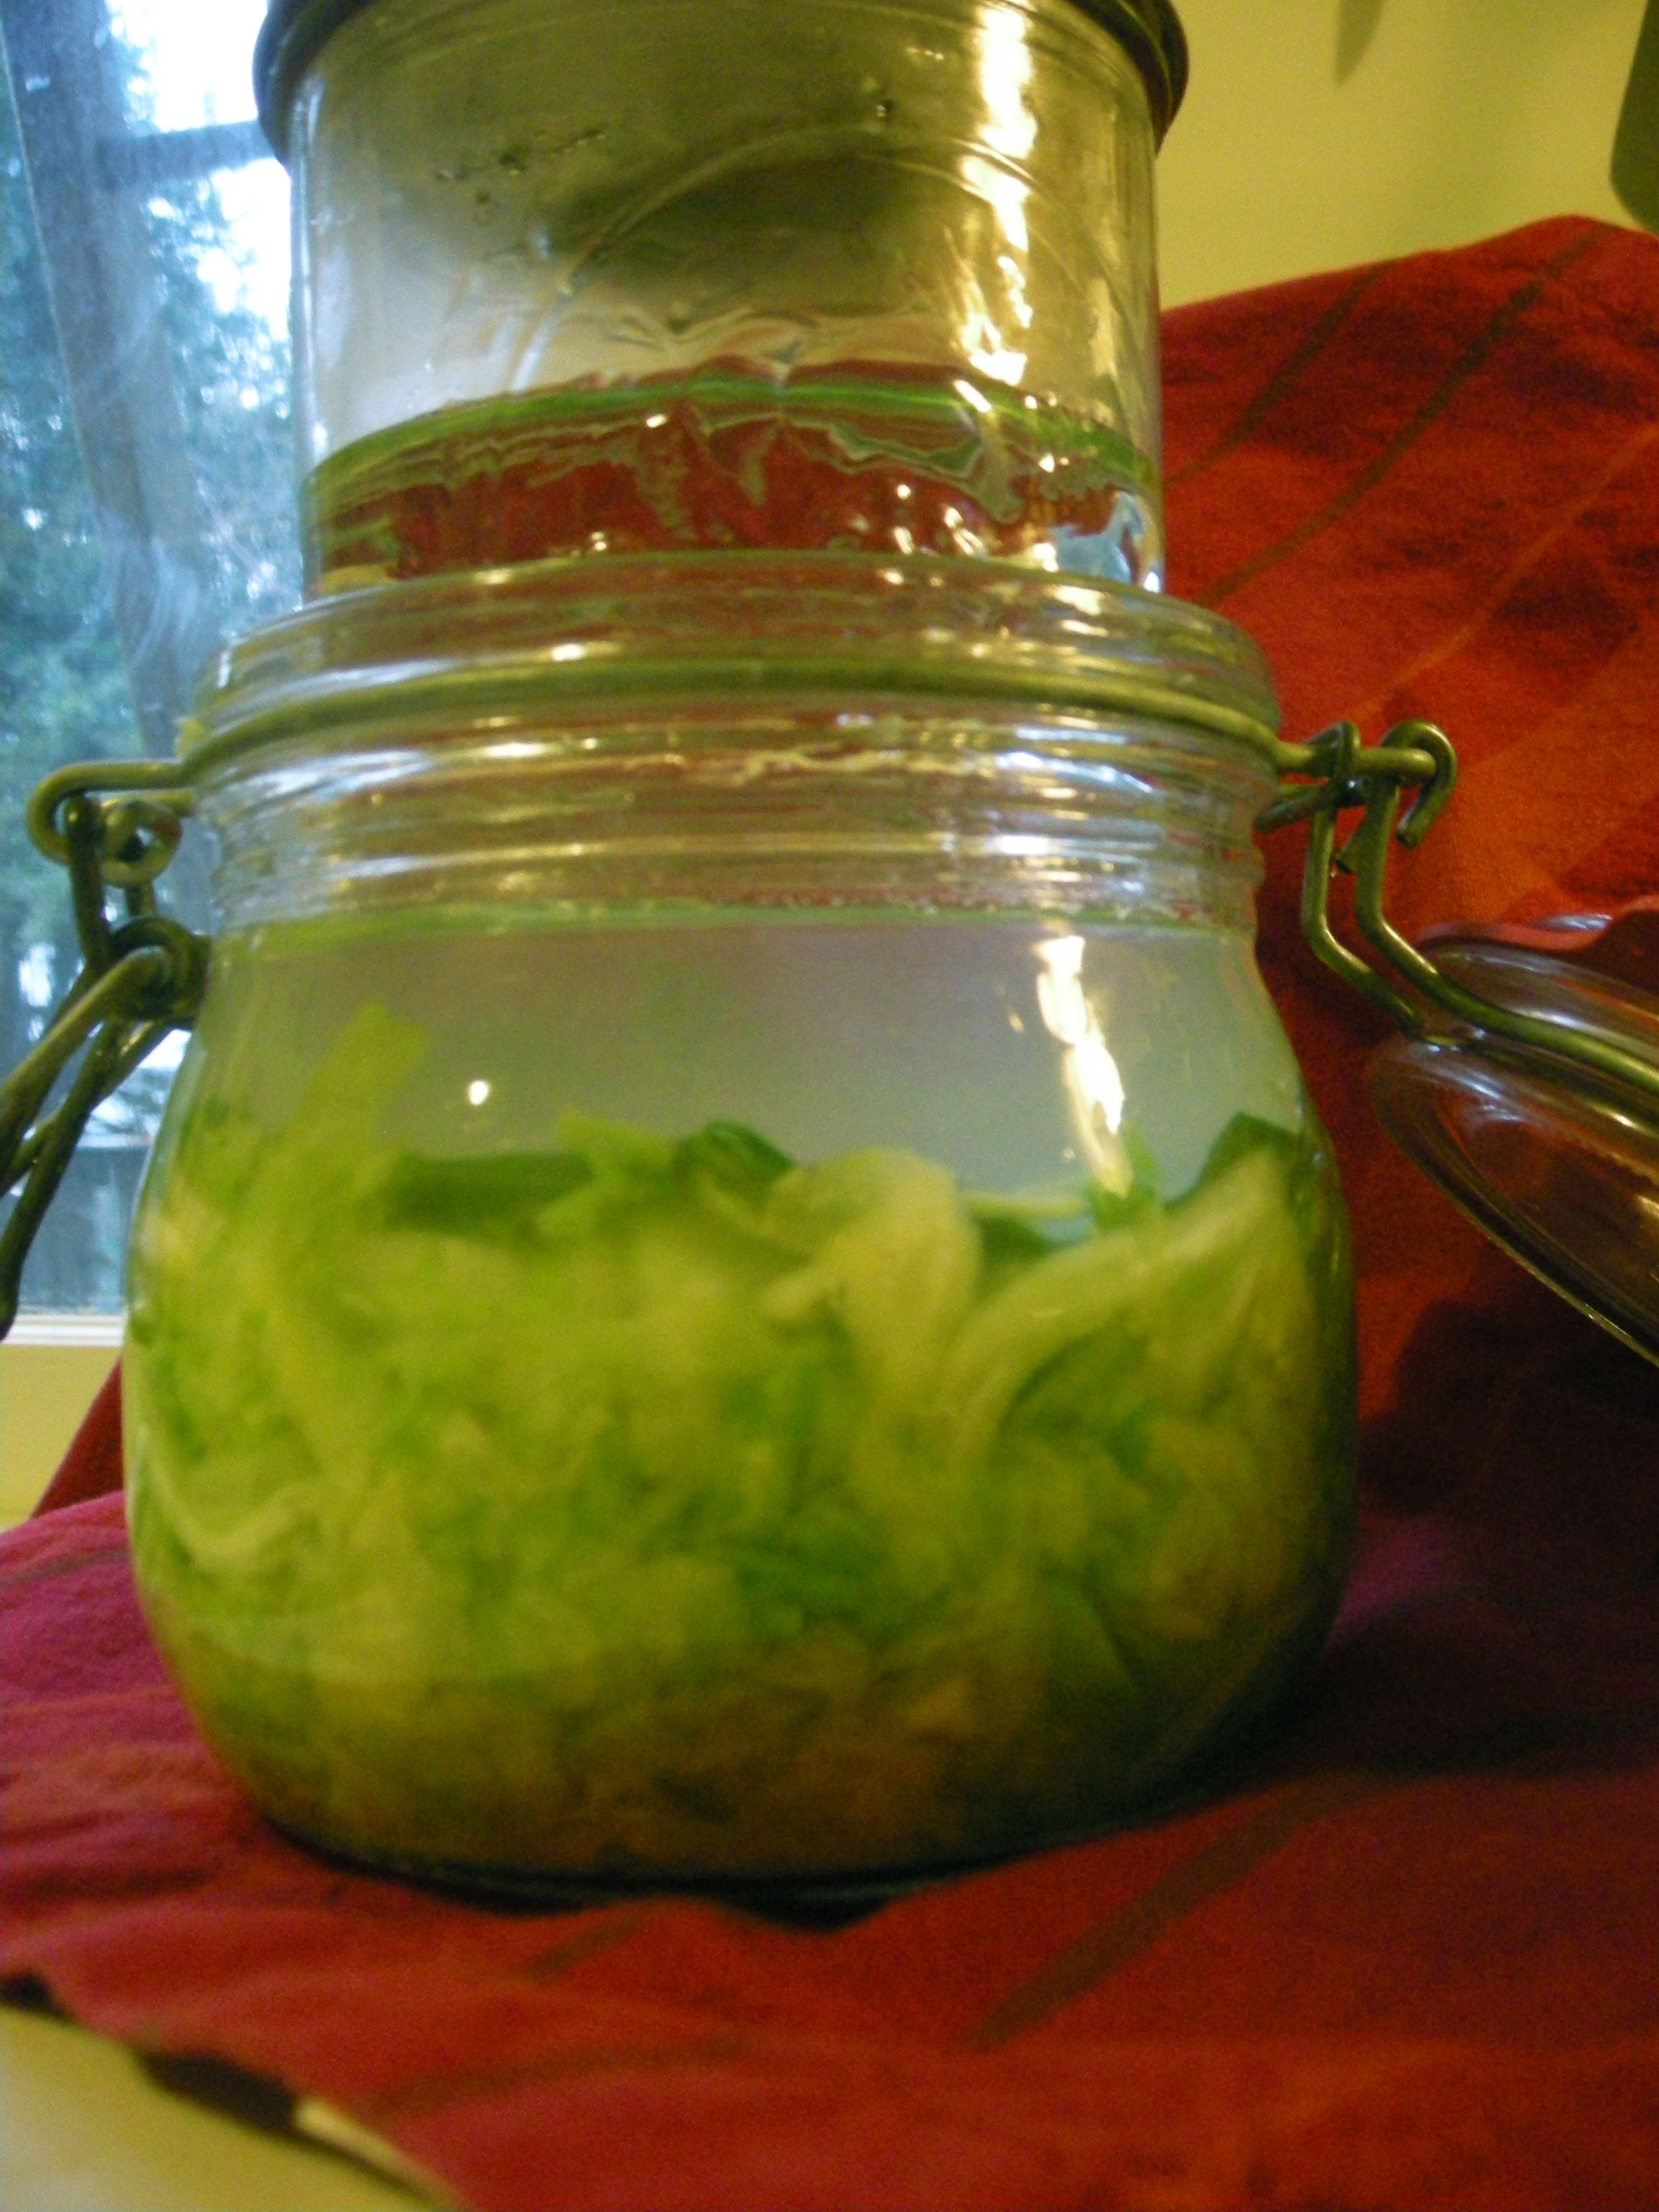
Waiting for the magic.


13. When your kraut is as sour as you’d like, remove the cheesecloth and cup and close the jar before refrigerating. Eat the kraut within 4-8 weeks. If you see discoloration or mold growing on the kraut, scrape it off or compost it if it is too pervasive.
14. My favorite way to eat kraut is in hot pressed sandwiches with mustard.

Soy Milk and Cookies

What does the bowl full of jelly Santa want? Full milk with cream on the top and buttery, overly sweet, cookies, left for him on the fireplace.
What does svelte, vegan Santa want? An ice-cold glass of homemade soymilk and tasty vegan cookies made with care.

Homemade soymilk is not as elusive as it might seem. Once the simple tools for the process are assembled, making milk can easily be part of your weekly routine. It took me a bit of practicing to get it right and now I make it at least once a week for all my coffee, tea, and cooking needs. You can even control the amount of creaminess by the volume of water added to the beans.

Vegan cookies, made with the soymilk, are it’s natural pair during any part of the year. The recipe below I use to make many different types of cookies by changing the flavors. Craving double chocolate brownie cookies? Add cocoa and chocolate chips. Lemon poppy seed seem tasty? Add zest and poppy seeds to the dough and top each cookie with a dab of lemon juice and powdered sugar glaze. Got ginger snaps on the mind? Ginger (both crystallized and fresh grated), allspice, and molasses get added to the mix and the dough is rolled in sugar before baking. One recipe, so many options.

Homemade soymilk

For this recipe, you will need:
1 ½ cups whole, dry soybeans
Water
Pinch salt
¼ cup sugar or other sweetener (optional)
8 daily calcium daily vitamins (optional, I add calcium because although I eat a lot of greens, I like to enrich my milk a bit because I like my spine nice and straight)

Tools:
Large bowl
Blender
Very large pot
Wooden spoon
Mesh strainer
Mesh tea strainer (small, with a very fine mesh, fits into the top of the mason jar)
½ gallon mason jar
Ladle

Process:
1. Rinse the soybeans in water. Pour fresh water over the soybeans in the bowl and let soak overnight.
2. Drain the beans and rinse.
3. Add 8 cups water (preferably filtered if you water tastes a little funky. Water imparts a lot of flavor to soymilk) to the beans.
4. Pour into the blender and whir until very smooth.
5. Pour into the pot and cook over medium heat. Add the salt, sugar and vitamins. Watch the pot and stir often to avoid boil overs.
6. Boil for 30 minutes.
7. Strain first through the large strainer into the bowl. Compost the solids.
8. Place the tea strainer on the Mason jar.
9. Ladle the milk from the bowl and strain into the Mason jar.
10. Refrigerate for up to 7 days, shaking before each use.

Double Chocolate Brownie Cookies (modified from HonestFare)

For this recipe, you will need:

3/4 cup sugar
1/2 cup canola oil
1/4 cup maple or agave syrup
3 tablespoons soymilk
2 teaspoons vanilla extract
1/4 teaspoon salt
1 2/3 cups flour
1/3 cup unsweetened cocoa powder
1 teaspoon baking soda
1 cup chocolate chips

Tools:
Measuring utensils
Rubber spatula
Bowl
Cookie sheet
Metal spatula
Cooling rack

Process
1. Preheat oven to 350°F
2. In the bowl, beat together the sugar, oil, syrup, soymilk, and vanilla extract.
3. Add the salt, flour, cocoa powder, and baking soda and stir until just combined. Stir in the chocolate chips.
4. Roll dough into balls 1 inch in diameter. Place 2 inches apart on the cookie sheet.
5. Bake 8 minutes until they look slightly dry on the top, but are still very moist in the interior.
6. Remove from the cookie sheet with the metal spatula and cool on the cooling rack.
7. Store in an airtight container or eat immediately. I prefer the second option.

Thanks to Rachel Silverstein for the charming illustrations.

Pear liquor

Holiday Homemade Gift Guide

Happy non-denominational, winter season festivities!

Since it seems to be the season of excess, let’s try not to add to the pile of hyper processed foods and unwanted, meaningless gifts from a big box store. Not only should good presents be useful and from the heart, they should be economical and ecological. Here’s a baby-sized list to get the creative juices flowing.

Homemade deodorant
Yes, yes I know that this can imply that the person that you are giving this to might be a little stinky, but let’s look at the bright side – this gift is easy to make, is useful on a daily basis and can be presented in a classy way. Also, this recipe doesn’t have any questionable ingredients and definitely no nasty carcinogens. Who wants cancer for a gift? No one, that’s who.

This recipe has two options, either a power or stick deodorant. I prefer the powder and I keep a small piece of felt in the jar for application. For the stick version, you will need coconut oil and an empty deodorant container.

For this recipe, you will need:
¼ cup baking soda (for odor neutralization)
¼ cup cornstarch (for moisture absorption)
A few drops tea tree oil or lavender essential oil (for scent masking and antibacterial properties)
2 tablespoons coconut oil (optional)

Tools:
Measuring cup
Spoon
Bowl
Small jar with a lid (I used a 1 cup wide mouth canning jar) or an empty deodorant container, if using the coconut oil

Process:
1. Combine the baking soda and cornstarch in the bowl.
2. Stir in the tea tree or lavender oil into the dry mixture.
3. Either stop and pour into your jar or mash in 1 tablespoon coconut oil with the back of the spoon. Coconut oil can be warmed under hot water or in a microwave to make mixing easier.
4. If your mixture is not yet a paste, continue adding small amounts of coconut oil until it holds shape.
5. Press into the deodorant container.

Infused oils, spirits and extracts.
For the person who can’t stay out of the kitchen, a perfect present could be a oil, spirit or extract of the their favorite flavors. The following recipes are just suggestions and should not limit your imagination. In general, you cannot do too much wrong to these concepts.

Chipotle Infused Olive Oil

For this recipe, you will need:
2 dried chipotles
1 cup extra virgin olive oil

Tools:
Funnel
Bottle
Cork or capable spout

Process:
1. Push the peppers into the bottle. (If you are using another flavoring like herbs, citrus peels or spices, make sure that they are dry)
2. Add oil using the funnel.
3. Cork and let sit in a cool, dark place for 6-8 weeks before using.

Spiced Pear Brandy

For this recipe, you will need:
1 star anise
1 stick cinnamon
4 cloves
1 small chunk fresh ginger
1 pear, cubed (my favorite is comice)
Enough brandy to submerge the flavorings, about 4 cups

Tools:
Quart canning jar
Bottle for giving in (optional)
Strainer

Process:
1. Pour spices and pear cubes into the canning jar
2. Add brandy and close container.
3. Let sit in a cool, dark place for 6-8 weeks before using. Strain and pour into an attractive (reused!) container, if desired.
4. P.S. my favorite way to drink this is with a little peach or pear soda over ice with a few of the pear chunks on top. Tastes just like pie!

Vanilla Extract

For this recipe, you will need:
1 vanilla bean (Fair Trade, if available)
½ cup vodka

Tools:
Funnel
Small Bottle
Cork or capable spout

Process:
1. Score the vanilla bean lightly so that more surfaces are exposed, but the seeds are not released. Place in the bottle
2. Add vodka using the funnel.
3. Cork and let sit in a cool, dark place for 6-8 weeks before using.

The senior, athlete, insomniac, or heat challenged person in your life might very well need a grain-heating bag. This bag can be popped in a microwave and will stay warm for at least an hour. Suggestions for the receiver are to heat one up to brave the outdoors or a chilly car, to help them lower the thermostat in comfort, and to pre-heat beds for sweet dreams. I like to sew seams along the length to keep the grains in place, but that step is completely optional.

For this project, you will need:
A piece of fabric, 36 1/2 inches long by 8 inches wide. The fabric must be made of a natural fiber like cotton, hemp, linen, or bamboo and have a very small weave.
Cotton sewing tread
6 cups whole wheat grains (if your receiver has wheat allergies, use brown rice)
2 tablespoons lavender buds, rose petals, or other fragrant botanical (optional)

Tools:
Sewing machine or needle (and patience)
Ruler
Scissor
Pins
Iron (helpful, but not necessary)
Large bowl
1 cup measuring cup

Process:
1. Sew a ¼ inch seam around 3 edges of the fabric to make a large tube.
2. Measure and mark every 6 inches on the tube.
3. Mix together the wheat and herbs in the bowl.
4. Add 1 cup of the grains to the tube.
5. Sew a seam at the next 6 inch mark.
6. Repeat steps 4 and 5 until the last mark is reached.
7. Turn the edges in, pin, and close up the tube.
8. The grain bag is microwaved for 5 minutes for maximum satisfaction.

Fall leaves

Community Ratatouille

Like I’ve mentioned before, the CSSC has a long history of eating well. Not only can we make some mean potluck dishes and serve hundreds on donated food, we feed our leaders family style meals during our summer and winter leadership retreats. For some of us, eating our favorite CSSC meals evokes the community that we miss.

One of the primary ways that the CSSC stays in touch with one another is through conference calls. I think that perhaps we should start a tradition of making and eating the same or similar meals and enjoying them together. A virtual potluck, right?

When we plan these meals, we think of two things: how can we get that food and how are we going to cook it. We take very simple (but incredibly yummy) recipes and make sure that we can scale them up. I like to make stew-y dishes like ratatouille because it is just one huge pot of love. Add the polenta and you are looking at only two pots to clean. For summer retreats ratatouille is perfect; we get to enjoy summer and fall’s best with eggplant, peppers, squash, and tomatoes.

Coincidentally, I had my first bite of ratatouille with CSSC-ers. I did some “urban camping” with a CSSC friend and we rendezvoused at another CSSC’s house in the Portland area. Her mother whipped us up a delicious ratatouille, perfect for the crowd of vegetarians that swarmed her home.

I hope this recipe comes to represent for you what it does for me: the best of late summer and early fall, community, and friendship.

Sauté Together:
Swig of olive oil
4 cloves garlic, minced
1 onion, chopped
1 bay leaf

Cook over medium high heat until the onion is beginning to caramelize.

Then add:
1 medium eggplant, cubed
1 zucchini, cubed
1 bell pepper, in strips
1 14 oz can diced tomatoes or fresh tomatoes, quartered

Cook until eggplant is soft and tender.
Add:
¼ cup fresh parsley, chopped
¼ cup fresh basil, chopped
1 teaspoon fresh oregano, chopped
1 teaspoon fresh thyme, chopped
1 teaspoon fresh rosemary, chopped
Salt and pepper to taste.

Serve with Polenta, or top with a poached egg and cheese sauce.

Polenta:
5 cups water
1 ½ cups course cornmeal
½ tsp. salt
pepper to taste.

Bring 4 cups of water to a rolling boil. Mix together the remaining cup of water with the cornmeal and pour into the water. Stir continuously with a whisk to beat out lumps. Boil for about 10 minutes until thick. Add salt and pepper.

Left over polenta can be cut into slices and fried in olive oil for a tasty snack.

Thanks to Rachel for the beautiful cartoons – you’re the bestest!

Patty Pat the Squash always knew she'd be the prima ballerina of the soup troupe.

Summer/Fall-is-way-too-corny-taco-soup

Please forgive the fact that this post was written, but not posted, long ago. As an update, our warm fall and wet spring this year allowed a long harvest period. Enjoy!

Summer-is-way-too-corny-taco-soup

Don’t get me wrong, I love my CSA. I love that it is produced by my university’s student farm, I love that it allows me to eat with the seasons, I love that I can pick it up on my bike ride home from campus because fossil fuels don’t get the time of day with my veggies. What I don’t love is the quantities of some things that we get. Can two people really eat 7 ears of corn, 5 squash, two huge bags of tomatoes, cukes, tomatillos, green beans, onions, garlic, basil, 2 different types of eggplant, sweet and spicy peppers, melons, apples, jujubes, and grapes like we received this week? No, they cannot – at least not without the aid of this soup.

Soup in summer does seem like a bit of sweaty drag, but trust me on this one. Take a cue from traditional foods in hot countries, India’s fiery curries, Thailand’s almost unbearable chili sauces, and Mexico’s potent moles. To get relieve in summer, you must sweat it out. Hot soup + hot spices = healthy pores. Grab a gallon of water, a bucket of ice, a (reusable) straw, and this soup and start the cooling goodness that doesn’t completely ruin your energy bill or the planet.

Patty Pat the Squash always knew she'd be the prima ballerina of the soup troupe.

For this recipe, you will need:
3 tablespoons olive oil
1 medium onion
3 cloves of garlic, minced
2 ears of corn
1 large or 2 small sweet peppers
1 jalapeno, minced
1 summer squash
2 tomatoes
1 tablespoon taco seasoning (This is sold in the bulk section in my grocery store and is salt free, feel free to use the kind that comes in packets, just make sure to check the salt and bouillon levels!)
1 ½ tablespoon Better Than Bouillon (my favorite broth product), 1 ½ cups vegetable stock, or 1 ½ bouillon cubes
3 cups water for the bouillon options or 1½ cups water for the stock option

Toppings
Dairy free sour cream (I like Better than Cream Cheese by Tofutti)
½ cup cilantro
Avocado
Hot sauce
Nutritional yeast

Tools:
Large stockpot or Dutch oven
Spoon
Knife
Mandolin (optional, but very helpful)
Garlic press

Process:
1. Heat oil in the pan over medium high heat.
2. Chop onion and sauté until golden brown.
3. Meanwhile, remove the kernels from the ear of corn. De-stem and remove the white pith and seeds from all the peppers. Chop the sweet peppers and mince the jalapeno.
4. Add the garlic and corn. Sauté until the corn is starting to caramelize.
5. Slice the squash into very thin rounds, less than 1/8th of an inch is ideal. The mandolin is the best tool for this job.
6. Add the taco seasoning to the pot. Cook until the spices are fragrant.
7. Stir in the squash and peppers. Sauté for about 2 minutes and then add the broth and water or the bouillon and water.
8. Bring to a boil and simmer for about 10 minutes, or until the squash and the peppers are tender.
9. Serve in large bowls and top with sour cream, cilantro, avocado, hot sauce, and/or nutritional yeast.
10. Enjoy with your favorite folks

Monumental thanks to Rachel for the cute cartoons.

Fondue

Picnic Part Three! Faux crab cakes and dessert.

Can you really have a picnic without faux crab cakes and fondue? My guess is yes, but I wouldn’t want to risk it.

The faux crab cakes are one of my favorite make for dinner now and enjoy for lunch later recipes. Even though there is nothing that beats crunchy, freshly pan-fried goodness, a squeeze of lemon juice on these puppies with a salad or rice is phenomenal in its own right. This recipe does contain one egg. If you are an egg-free person, feel free to substitute the egg with soy egg replacer or with dairy-free creamer. I don’t suggest just using dairy free milk; there are more binding properties in the creamer.

Fondue on a picnic? How? I am the proud owner of a backpacking stove and it allows me to give my picnics a little more pizazz. After I made the fondue at home, I packed it in a canning jar. I also packed a small pot for a makeshift baine maire (or water bath). When fondue time came, we warmed some water in the pot and plopped in the fondue jar. Make sure that the water level is not too high and doesn’t overflow into the fondue! We used chopsticks to dip fruits and sweets into the fondue, but fondue fork would be great or fingers for the decidedly not classy. I think that this would be sensational during a backpacking trip too, if you are more into gourmet than grime on the trail.

Faux Crab Cakes
(significantly modified from Plenty, by Yotam Ottegli)

This is what you will need for about four servings:
2/3 cups dry quinoa
1 leek or 4 small green onions
3 tablespoons flour
1 teaspoon chopped chili or chili paste like sambal oelek or sriracha (or to taste)
1 tablespoon chopped parsley
1 egg
½ teaspoon salt
2 cloves garlic, minced
¾ cup panko or bread crumbs
1-3 cups canola, peanut or another neutral flavored oil
Lemon wedges

Tools:
1 colander or sieve
1 medium saucepan
1 medium bowl
Spoon
1 medium sized, edged plate or pie pan
Cast iron frying pan
Spatula
Wire cookie cooling rack or folded paper towels

Process:
1. Wash the quinoa of its bitter, natural pesticide by rinsing under cold water in the colander. Rubbing the grain with your hands improves washing.
2. Place rinsed quinoa in the saucepan, and add 1 1/3 cups cold water. Bring to a boil and cook until the grains are not chewy, but the quinoa has not yet lost its ‘tails’. Lose tails are a sign of over cooking.
3. Drain the quinoa in the colander and rinse with cold water. Let cool.
4. Cut the top (about ¼ to ½ inch below the first leaf split) and the roots off the leek. Cut in half. Rinse the halved leek under water to remove any residual grit. The whole green onion can be used. Cut either into 1/8 inch slices.
5. Mix together the quinoa, leeks, flour, chili, parsley, egg, and salt into a bowl. The mixture should stay together. If the mixture is too wet or dry, add flour or non-dairy milk teaspoon-wise until manageable.
6. Heat the frying pan over medium high heat with about ½ inch of oil in it. Try to maintain this level of oil throughout the frying process
7. Form balls ¼ cup to 2 tablespoons (choose a size and stick with it) in size with your hands. Pour the panko or breadcrumbs into the pie pan and press each ball into the crumbs until 1 inch thick. Roll the patty on the sides for extra crispiness.
8. Test the oil by placing a leek slice in the pan. It should sputter and have bubbles forming around it if the pan is hot enough.
9. Fry the cakes. Be sure not to over crowd the pan. Each cake should be at least 1 inch away from its neighbors. Flip cakes when golden brown on one side and remove when both sides are golden brown. The center should be firm when cut in half. Drain to remove excess oil on the rack or paper towels.
10. Note that the cakes will cook faster as more particulates build up in the pan. I suggest turning down the heat a bit after each frying round to avoid burnt cakes.
11. Serve with lemon wedges for squeezing.

Picnic Fondue

This is what you will need for about four servings:
1 cup non dairy creamer or milk (I like almond, hemp and coconut milk)
2/3 cup chocolate or carob chips, preferably Fair Trade
1/8 teaspoon cinnamon (optional)
1 tablespoon vanilla
2 tablespoons coffee, orange, or raspberry liquor (optional)

Dip-ables
Sliced fruit such as peaches, nectarines, bananas, pears, apricots, kiwis, or plums depending on the time of year.
Washed berries such as strawberries, raspberries, blackberries, cherries, mulberries, or blueberries, depending on the time of year.
Vanilla or chocolate cookies or wafers
Vegan marshmallows
Peanut or other nut butter
Tools:
At home –
1 medium saucepan
1 whisk
1 rubber spatula
1 canning jar
Plastic or glass container for the prepared dip-ables

At the picnic/campsite
Camp stove
Flint, matches or lighter
Small pan
Water
Spoon
Chopsticks, fondue forks or fingers (spoon needed for the nut butters)

Process
1. Place the creamer or milk and chocolate/carob in a saucepan and heat over medium low heat. Stir constantly to prevent the chocolate from burning. Use the whisk to break up chocolate lumps and the spatula to scrape the bottom.
2. When all the chocolate is melted, remove from the heat and add the cinnamon, vanilla and/or liquor.
3. Pour the fondue into a canning jar and refrigerate.
4. Prepare the fruit by washing, slicing, and peeling to your preference.
At the picnic site:
5. Set up the camp stove and start a medium flame, according to the directions.
6. Place the canning jar in the small pot. Fill with water so that you can comfortably stir and not get any water into the canning jar. Place over the stove.
7. Stir using the spoon to again prevent the chocolate from burning or over heating. When all of the fondue is melted, remove the pot from the stove, but leave the jar in the water. This will extend your dipping time.
8. Dip your dip-ables and marvel in your gourmet-ness. I especially love dipped nut butters – it is like a made to order peanut butter cup!
9. Share with friends.

Thanks to Rachel Silverstein for the chocolate loving marshmallow!

Hot Chili

Picnic Party Part 2 of 3

Welcome to part two of the picnic adventure!
Last time I shared the recipes for gazpacho and grilled veggies, which we will be using for the potato and corn salads.

Classic potato salad, while delicious, is a big pile of unhealthy. With tons of eggs and oil in the mayo, topped with more hard-boiled eggs, potato salad is neither vegan nor heart healthy. The eggs also increase the chances of food poisoning, not the best choice for a picnic on a hot day. This salad, on the other hand, contains no eggs and won’t make you fall asleep a saturated fat food coma.

The corn salad is light and crisp with smoky undertones from the barbecued corn. The best corn is fresh corn. Corn’s sweetness decreases exponentially after it is picked and the sweetest corn is eaten within 24 hours of picking. When selecting corn at the market, don’t shuck the corn there! Shucking the corn is the vegetable equivalent of peeling a banana in the store; it is just a bad idea. Instead, firmly press your fingers against the ear. Feel for evenly formed kernels with no humps and bumps. If you must pull back the husks, use your finger nail to puncture one kernel – it should burst and be quite crisp. The husk should be crisp too, not limp. Look for silk that is fluffy and dry, not moldy and smushed together. Added benefit of the not shucking the corn is lots of good green stuff for the compost pile! Note that once you cook the corn, the sweetness should not decrease.

Potato Salad

For each serving, here’s what you will need:

4 waxy, new potatoes about 1 ½ inches in diameter (my favorites are russian bananas, german butter balls, fingerlings, and blues)
1 tablespoon onion, minced
1 small summer squash, grilled
1 tablespoon parsley, chopped
1 tablespoon (or more) sundried tomatoes, olives, and/or pickled vegetables (optional)
1 tablespoon olive oil
1 tablespoon apple cider vinegar
1 tablespoon Dijon or country style mustard
¼ teaspoon salt (or to taste)
¼ teaspoon pepper (or to taste)

Tools:
1 medium saucepan
Colander
Small paring knife
Spoon
Large bowl

Process:
1. Quarter potatoes and place into the saucepan. Cover with cold water and bring to a boil (this method will help keep your potatoes intact). Adjust heat until the pan is simmering (small bubbles, not a rolling boil). Cook until tender, but the potatoes still hold their shape.
2. Pour the potatoes into the colander and douse with cold water. Let cool.
3. Meanwhile, chop the squash into a ½ inch dice. Chop the parsley and other veggies.
4. When the potatoes are still warm nut you are able to touch them with out burning your fingers, peel them using the paring knife. Cut them into ½ inch cubes.
5. In the large bowl, combine oil, vinegar, mustard, salt, and pepper. Add the potatoes, veggies, and parsley. Toss lightly with clean hands.
6. Share with friends.

Corn Salad

For each serving, here’s what you will need:
1 ear barbequed corn
¼ red onion, grilled
1 small sweet pepper (like Jimmy Nardellos, gypsy, or bells), grilled
¼ jalapeno pepper, grilled
2 teaspoons honey, maple syrup, or agave syrup
1 tablespoon olive oil or grapeseed oil
1 teaspoon red wine vinegar
3 leaves fresh basil
Salt and pepper to taste

Tools:
Knife
Cutting board
Large bowl
Spoon

1. Remove the kernels from the ears of the corn. Because I am not a daredevil, I like to break the ears in half with my hands before slicing off the kernels.
2. Chop the grilled onion and the sweet pepper. Mince the jalapeno.
3. In the bowl, mix together the honey, oil, vinegar, and salt and pepper.
4. Add the veggies and toss light with clean hands. Chiffonade the basil and garnish.

Exuberant thanks to Rachel Silverstein for the charming cartoons.

Blender

Picnic Party Part 1 of 3

I LOVE picnics! Food always tastes better outside, especially when there is a threat of ambush by ants. Grab a blanket and head for the great outdoors; this one is going to wow you.

When designing a picnic, think about feasibility. I knew that I would have limited access to cold and I also wanted to incorporate a heated element to my picnic.

Also consider what type of containers you are going to use. I choose to put each item in a small, glass, canning jar for each person. Not only does glass not have the toxic properties of plastic (especially when exposed to oil, yikes!), but also it has a relatively limitless lifetime for recycling, unlike plastic. I decided to forgo an ice chest for this picnic too. Coolers are generally made from Styrofoam and this way I can avoid buying this stuff which will out live us all by a long shot. I kept my munchies cold by placing all items in a flat basket with ice blocks and cooler packs and then wrapped the whole shebang in a thick quilt. Even though this was not designed for long term or extremely hot storage, the blanket’s insulating properties kept the food out of the danger zone (40F and 140F, you might as well serve cocktails with umbrellas to the microbes, because this range is their paradise!).

Since we are going over an entire meal instead of just one or two menu items, I’m going to break the recipes up over three posts.

Overall menu:
Tomato Gazpacho (This post)
Potato Salad (Next post)
Corn Salad (Next post)
Quinoa Faux Crab Cakes (Last Post)
Chocolate Fondue and dip-ables (Last Post)

This post contains the recipe for Tomato Gazpacho and veggie prep for the salads.

Tomato Gazpacho
(modified from Gourmet magazine)

For each serving, here’s what you will need:
1 1inch piece of dry baguette
Enough warm water to cover the bread
1 medium tomato
1 tablespoon onion, minced
1 clove garlic, minced
1 tablespoon olive oil
2 teaspoons red wine vinegar

Tools:
Bowl
Blender
Knife
Process
1. Cut off the crust of the baguette. Place in a small bowl and cover with warm water.
2. Wait 30 seconds then remove bread and gently squeeze out the excess water
3. Roughly chop the tomatoes and place all ingredients in the blender.
4. Blend until smooth
5. Chill until ice cold
6. Share with friends

Barbecued Veggies for salads

For the barbecued veggies, here’s what you will need for each person
1 ear corn
1 small sweet pepper (like Jimmy Nardellos, gypsy, or bells)
¼ jalapeno pepper
¼ large red onion
1 small summer squash (like zucchini, patty pat, or crookneck)
2 tablespoons olive oil
½ teaspoon salt (or to taste)
½ teaspoon pepper
1 clove garlic, minced

Tools:
Barbecue, I prefer to use lump charcoal, which contains no harmful additives or fillers
Tongs
Knife
Large bowl
Garlic press
Pastry brush


Process
1. Light barbecue (I prefer to use a chimney starter to avoid using lighter fluid)
2. Shuck the corn by carefully pulling back the husks, removing the silk (a flame can easily sizzle off any remaining silk), and pulling the husks over the corn again
3. Slice the sweet pepper and jalapeno in half and remove the white pith and seeds. Make sure to wash your hands with soap and warm water before moving to the next step. The pith contains the highest concentrations of the spicy oils in the jalapeno
4. Slice the red onion into 1/2 inch thick rounds to make rings (try to keep the onion intact for easier flipping on the grill)
5. Slice the squash length-wise to make long, ¼ inch slabs
6. Pile all of the veggies except for the corn in a large bowl and drizzle oil over the top. Add salt, pepper, and garlic and toss gently with your hands.
7. Check the grill for temperature. The coals should be glowing red and should feel very warm when you let your hand hoover over them.
8. Grill veggies. It might take several batches, especially if you are cooking for a crowd. Keep corn wrapped in the husks until the kernels turn a slightly more intense color (white corn turns slightly yellow, yellow corn becomes more intensely yellow). Then unwrap corn and use the pastry brush to slather with extra oil and garlic from the bowl.
9. Cooked veggies should have crisp edges and blistering on the skin. The squash and the onions should be limp, but still able to hold their shape.
10. Refrigerate after removing from the grill. Grilling can be done up to 3 days in advance.
11. Alternatively, the veggies can be roasted in a oven set to 400F. Corn should be boiled for 1 minute if you are foregoing grilling.

Thanks to artsy fartsy Rachel Silverstein for the sauve comics.

Energy Utilizing Garlic

I mentioned it in my last post, but one of the many energy saving techniques I try to use in the kitchen is to pack my oven each time I turn it on. Delicious roasted garlic is the perfect energy saver and most wonderful ingredient on hand. Just remember to pop it in when the door is already open - ovens drop 25F each time you open them!

When I make roasted garlic, I usually make several heads worth and store them in the freezer in a (not over packed) glass jar. Why the freezer? Freezers are more energy efficient when they are full as long as the things that you are adding to them are not sizzling hot.

Not only is this garlic good as is smeared on bread or eaten straight out of the foil (for the daring), but it is also a fabulous ingredient. Soups, stews, salads, baked potatoes, and life all benefit from a hefty spoonful of roasted garlic.

Right now is the best time to stock up on garlic – garlic is traditionally planted on the winter solstice and harvested on the summer solstice. Since garlic needs time to cure and dry, this year’s supply of garlic is hitting the markets now.

Here’s what you will need

1-10 heads of garlic
1 tablespoon olive oil per head of garlic
½ teaspoon kosher salt or to taste
½ teaspoon freshly ground black pepper or to taste

Tools:
Aluminum foil (preferably recycled)
Parchment paper (preferably unbleached and recycled)
Oven, with other things cooking in it, set between 300-425F

Process
1. Peel garlic cloves. Whole cloves are the best for presentation, but if it is easier for you to smash, smash away. Be sure to compost those peels – they are a great carbon source for your pile!
2. Cut a piece of foil and parchment large enough to accommodate the cloves. The foil should be on the outside and the garlic should be directly on the parchment.
3. Drizzle with oil and add seasonings.
4. Fold up into a packet, ideally flatter than it is wide for better heat penetration.
5. Pop in the oven. Depending on the temperature needed for the other things you are making, baking will take between 30 min to 1 hour. The best cloves will be cooked until soft and will have a suggestion of caramelization on many cloves.
6. This method also works well on barbecues, but I suggest placing the packet on the grill, not in the coals.
7. Serve immediately for a roasted veggie smorgasbord, or let cool to room temperature, place in a glass container (oil on plastic is bad news bears) and freeze.
But wait there’s more -
Here’s the best thing since garlic was roasted.

You will get many dates with this bread dip.

Here’s what you will need
¼ - ½ cup roasted garlic
1-2 avocados, soft at the top, near the stem
Squeeze of lemon juice (do me a favor and use the real stuff)
Sliced baguette, dinner rolls, crackers, really any dip-able.

Tools:
Bowl
Knife
Spoon

1. Put the roasted garlic the bowl.
2. Here’s my favorite method for slicing avocado:
a. Cut around the pit through the stem to half (instead of through the side and creating a weird half)
b. Twist to separate the halves
c. Use the blade of the knife to remove the pit by lodging in the pit and pulling back
d. Slice the avocado, but not the skin, in a crosshatch way.
e. Use the spoon to scoop out the flesh and put into the bowl
3. Add the lemon juice
4. Mash the garlic and avocado together, leaving rough chunks.
5. Serve with bread and dippers.
6. Share with loved ones.

Insurmountable thanks to Rachel Silverstein for the gorgeous artwork.

Eggplant Nonmesan

This is a hearty dish so make sure that you are feeling up to a challenge. Traditional eggplant parmesan is also one of the most satisfying vegetarian dishes for the recent transition-er to a meat free life. While it might be tasty, it is still packed with lots and lots of animal fats and eggs. Enter veganization!

Although we won’t nix the frying of the eggplant, this vegan alternative doesn’t have any cholesterol and is much, much lower in saturated fats. When all those unhealthy and unnecessary ingredients gone, the flavors of summer can really shine.

This dish is also perfectly in season. Eggplant and tomatoes, the backbone of the meal, are growing rampantly in California. Since I’m a bit lazy, I don’t peel tomatoes and so organics are not only a good idea, but are really essential for this meal. However, don’t get too lazy and use canned tomatoes. There was a recent article about the 7 foods that farmers and food researchers would never eat and canned tomatoes topped the list. Bad news bears, especially when it is fresh tomato season!

I encourage the use of organic, local, and responsibly produced food, but everyone’s financial and accessibility situations are different. Unfortunately, that translates to less food empowerment for everyone. Check out the Real Food Challenge campaign to help end this injustice.

Enough of the toxic tomatoes and cholesterol chatter – let’s get to the recipe:
Here’s what you will need

For the fried eggplant:
I large to medium eggplant (1-2 pounds)
1 teaspoon kosher salt
½ cup whole wheat (or a gluten free alternative like sorghum flour)
1 tablespoon cornstarch
¼ cup medium ground corn meal
¼ teaspoon salt
¼ teaspoon black pepper
1 cup water, ice cold
Enough grapeseed or rapeseed (canola) oil to cover the bottom of a cast iron frying pan with a ½ inch of oil

For the marinara:
2 tablespoons olive oil
½ cup onion, diced
½ teaspoon salt
4 cloves garlic, crushed
1 small sweet pepper like Jimmy Nardellos, Bullhorn or Gypsy (Jimmies are my favorite), chopped
1/8 teaspoon cayenne pepper (optional)
¼ teaspoon fennel seeds (optional)
½ cup red wine
2 tablespoons brown rice, agave syrup, maple syrup, or honey (if you are that sort of vegan) or 1 tablespoon raw sugar or ½ cup apple juice
5 large tomatoes
¼ cup nutritional yeast
¼ cup fresh basil, sliced thinly using the chiffonade method

Topping:
½ cup sliced or shredded dairy free cheese (my favorite is made from rice milk which doesn’t have the “dirty” after taste like many soy cheeses, optional)

Tools:
Vegetable peeler
Knife
Cutting board
9×9 square glass or ceramic baking dish (metals can react with the tomatoes)
Large sauce pan or enameled Dutch oven
Garlic Press
Wooden spoon
Stick or stand blender (optional)
Small bowl, with a bottom large enough to accommodate your largest eggplant slice
Metal tongs
Cast Iron frying pan (I prefer cast iron over synthetic Teflon any day. Not only are cast iron pretty cheap, I got my 12” at a thrift store for $10, they will last FOREVER. Not so much with Teflon, which releases toxins and seriously degrade with overheating.)
Paper towel or metal drying rack

Process:
1. Wash and peel the eggplant using a vegetable peeler.
2. Slice into 1 inch thick rounds
3. Using the 1 teaspoon salt, salt the rounds of eggplant. Use your fingers to distribute the salt evenly.
4. Place slices in the baking dish and put the frying pan on top of the slices. The weight of the pan will help removing the excess moisture from the eggplant.
5. While the eggplant is salting, begin on the marinara.
6. Heat your saucepan or Dutch oven over medium high heat and add the olive oil
7. Sauté the onions and salt until soft and golden brown.
8. Add in the crushed garlic, sweet pepper, cayenne pepper, and fennel. When I am using a garlic press, I don’t bother peeling the garlic. Make sure to remove the peels before crushing the next clove. Sauté until the sweet peppers are soft. Feel free to add more oil to the pan if needed. The vegetables should look shiny and glistening.
9. Add the wine and the sweetener of your choice. Reduce until the sauce resembles salsa instead of soup.
10. Remove the stem site from the tomatoes and cut into large, rough chunks. Add to the pan and stir.
11. While the sauce is getting saucy with the pan turned down to medium low heat, begin frying the eggplant.
12. Preheat oven to 375F. When I am using the oven for just one dish, I try to maximize my oven space. I suggest baking potatoes or winter squash in the fall to fill up that underutilized space.
13. Using your hands, squeeze out any excess water from the eggplant over the sink.
14. Measure the dry ingredients for the frying batter into the small bowl (flour, cornstarch, cornmeal, ¼ teaspoon salt, black pepper) and mix using a fork.
15. Heat the frying pan over medium high heat with the oil.
16. With wet fingertips, flick water above the pan to test its heat. Oil that is hot enough should readily crackle.
17. Just before you begin frying, add in the ice cold water. Mix as little as possible while still eliminating lumps and dry spots.
18. Dip eggplant slices one by one into the batter and then gently place in the pan. Turn when slices are golden brown.
19. If your pan is not large enough to accommodate all the slices, you might need to do several rounds of this.
20. Remove slices from the pan when both sides are golden brown and place on the paper towels or the metal rack to drain off some oil. Ideally, the eggplant will be crispy on the outside and soft and creamy on the inside. If the slices are still underdone, more cooking can take place in the oven.
21. Back to the sauce – Since I like being lazy and don’t peel the tomatoes, I blend the sauce at the end to make it smooth and the skin bits less obvious. This step is completely optional. Let the sauce cool to less than scalding and either blend in a upright blender until smooth or leave in the pot and use a stick blender until smooth.
22. Return the sauce to the pan and stir in the yeast and the basil.
23. Place the eggplant slices in the 9X9 pan and cover with marinara. Top with fake cheese if desired. Bake at 375F for 20 minutes or until the eggplants are soft and creamy.
24. Enjoy with fellow activists.

Tremendous thanks to Rachel Silverstein for the beautiful and witty cartoons and for test driving the recipe.